Hey there! So, you want to know how to deep clean your leather car interior the right way? I’ve been down this road many times, and let me tell you—when you do it properly, it doesn’t just look amazing, it feels like a whole new ride. That luxurious leather finish deserves some TLC, and the results? Totally worth it.

Photos by pristinegreencleaning
If you’re dealing with light dirt, stains, or just general wear, I’m here to walk you through everything. From the tools you need to each detailed step, I’ve got you covered. And don’t worry—I’ll explain it all in simple, easy-to-follow language.
Let’s dive in and bring back that soft, clean, and rich leather feel to your car’s interior.
Why Leather Car Interiors Need Deep Cleaning
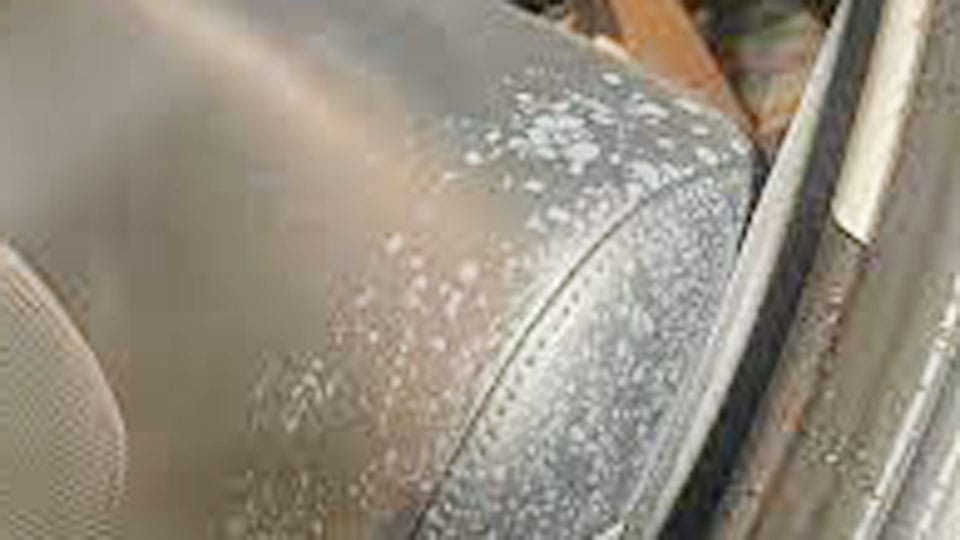
Leather may look classy, but it’s also a magnet for grime, oils, and dust. Think about how often you slide into your seat after a workout, with lotion on your skin, or just plain sweaty. Over time, all that gets absorbed into the leather.
And if you ignore it too long? That leather starts to dry out, fade, and even crack.
Deep cleaning doesn’t just make your car look good—it actually preserves the leather, keeps it supple, and increases the resale value of your vehicle.
Signs Your Leather Interior Needs a Deep Clean
Sometimes it’s obvious. Other times, not so much. Here’s what to look for:
- Dullness or discoloration in the seats
- A sticky or greasy feel
- Visible stains or watermarks
- Noticeable dirt in the seams and creases
- A faint musty or sweaty odor
If your car’s showing any of these signs, it’s time for a deep clean.
What You’ll Need to Deep Clean Leather Car Seats
Before we get our hands dirty, make sure you have the right tools and products. Here’s a handy table of everything you’ll need:
| Item | Purpose |
|---|---|
| Vacuum with soft brush attachment | Removes loose dirt and dust |
| Soft microfiber cloths | Gentle cleaning and wiping |
| Soft-bristled brush | Helps lift dirt from creases |
| pH-balanced leather cleaner | Safe cleaning without damaging the leather |
| Leather conditioner | Restores moisture and prevents cracking |
| Spray bottle with distilled water (optional) | For diluted solutions and wiping |
| Toothbrush (optional) | Great for tight spaces |
Having these ready makes the process smoother and ensures better results.
Preparing Your Car for a Deep Clean
This step is often overlooked, but it’s important. You don’t want to be pushing dirt around or trapping more dust into your freshly cleaned leather.
- Start by removing any personal items, floor mats, and loose debris.
- Use a vacuum with a soft brush to go over the seats, especially in the seams, stitching, and corners.
- Make sure your car is parked in a shaded, cool spot. Leather doesn’t like direct sunlight during cleaning—it dries too fast and could damage the surface.
Now, we’re ready for the fun part.
Step-by-Step Guide to Deep Cleaning Leather Car Interior
Vacuum and Dust First
I always start by vacuuming. Use a soft brush head to avoid scratching the leather. Pay extra attention to areas where crumbs, hair, and dirt collect—like the seat joints and edges.
Don’t skip this step. It keeps you from rubbing dirt into the leather while cleaning.
Apply Leather Cleaner Gently
Spray a small amount of leather cleaner onto a microfiber cloth—not directly onto the seat. This avoids oversaturation.
Work it into the leather using light, circular motions. Focus on one section at a time, and don’t rush it.
If you’re dealing with built-up grime, use a soft-bristled brush to gently scrub. Always test a small area first to make sure the cleaner doesn’t discolor the leather.
Wipe Away Residue
After scrubbing, wipe away the cleaner with a clean, damp microfiber cloth. You may need a couple of passes to get everything off.
Make sure there’s no cleaner left behind—it can leave spots or a sticky feeling.
Let It Air Dry Naturally
Once cleaned, let the leather dry naturally. Don’t use a heat source or hair dryer. Just open the doors or windows for airflow and wait about 20–30 minutes.
Apply Leather Conditioner
Once the leather is completely dry, apply a leather conditioner to keep it soft and moisturized.
Use another microfiber cloth and apply a small amount in circular motions. Less is more here—you don’t want it greasy.
Let it sit for 15–20 minutes, then buff it with a clean cloth to remove any excess.
Conditioning should always follow deep cleaning. It helps restore that smooth, supple texture and protects the leather from cracking or drying.
Deep Cleaning Leather Steering Wheel and Gear Shift
These areas are touched constantly and often get overlooked.
- Clean using the same process: vacuum (if needed), apply cleaner to a cloth, and gently wipe.
- Use a small brush for textured or stitched areas.
- Finish with a light application of conditioner—but use even less here since your hands touch these spots often.
Keep it non-slippery for safety.
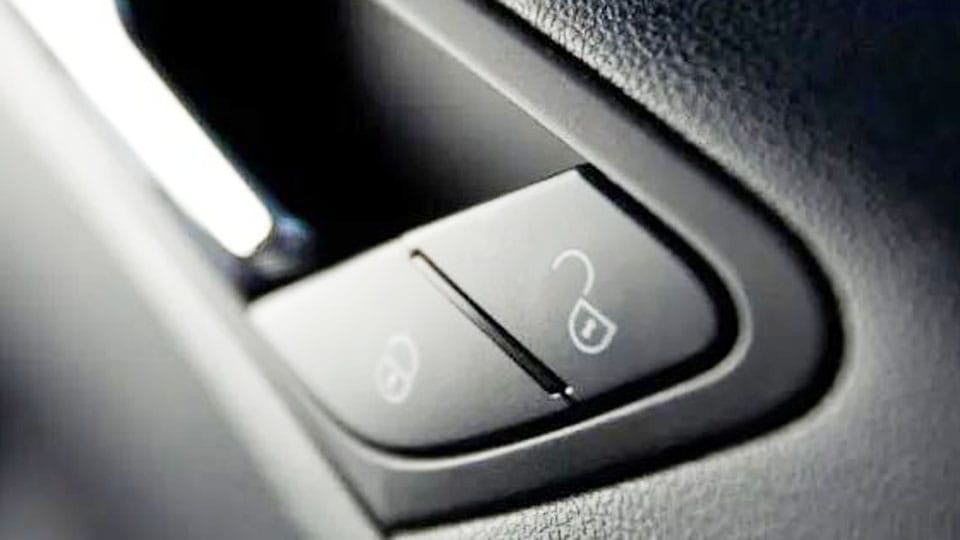
Cleaning Leather Door Panels and Armrests
Just like the seats, these areas collect a lot of oils and fingerprints. Use your leather cleaner and cloth to gently clean them.
Be cautious around buttons or speaker areas. Don’t oversaturate—less moisture is better here.
Once clean, apply a light layer of conditioner and buff it in gently.
Mistakes to Avoid When Cleaning Leather Interiors
Let me save you some trouble—here are a few things I learned the hard way:
- Never use household cleaners like bleach or ammonia—they will ruin leather.
- Avoid scrubbing too hard, especially on older or worn leather.
- Don’t skip conditioning after cleaning—it’s what keeps leather from cracking.
- Never soak the leather—too much moisture leads to mildew or damage underneath.
- Stay out of direct sunlight during cleaning.
Stick to leather-safe products and be patient. Leather is durable, but it needs the right care.
How Often Should You Deep Clean Leather Car Interiors?
Here’s a simple guideline I like to follow:
| Task | Frequency |
|---|---|
| Light wipe-down | Weekly or bi-weekly |
| Deep clean & condition | Every 3–4 months |
| Spill/stain clean-up | Immediately after it happens |
Regular light cleanings keep the interior looking good, but deep cleaning every season really brings it back to life.
Tips to Keep Leather Looking Great Between Cleanings
Want that clean look to last? Here are a few tricks I swear by:
- Use seat covers if you’re often in work clothes, gym gear, or outdoors.
- Keep a small microfiber cloth in the glove box for quick wipe-downs.
- Avoid eating or drinking in the car (I know, easier said than done).
- Keep windows cracked when parked on hot days to reduce leather stress.
- Store a small leather cleaner and cloth in your trunk for emergency spots or stains.
A little regular care saves you from bigger problems down the road.
Leather Vs Faux Leather: Does It Matter?
Yes, it does. Real leather is animal hide—it breathes, stretches, and requires conditioning. Faux leather or synthetic blends don’t absorb moisture the same way.
Always check your owner’s manual to know what you’re working with.
If your car has faux leather (like vinyl or leatherette), you can skip conditioning, but still clean it gently and regularly. And never use leather-specific conditioner on faux leather—it’ll just sit on top and attract dirt.
Conclusion
There you have it—a full, simple guide on how to deep clean leather car interiors. It’s one of those jobs that sounds overwhelming, but once you get into it, it’s honestly pretty relaxing. The results speak for themselves. You’ll slide into your seat, and it’ll feel like a luxury ride again.
Taking care of leather doesn’t just protect your investment—it adds a little joy to every drive.
If you haven’t deep cleaned your leather in a while, today might be the perfect day to start. Grab your gear, find a shady spot, and get to it. Trust me, you’ll love how fresh your car feels when you’re done.
Frequently Asked Questions
What is the best leather cleaner for car interiors?
Use a pH-balanced leather cleaner specifically made for automotive interiors. I personally look for products labeled “safe for all leather types” and avoid anything with alcohol or harsh chemicals.
Can I use vinegar or household soap to clean leather car seats?
No, it’s not a good idea. Vinegar and household soaps can dry out the leather and cause long-term damage. Always stick with products designed for leather.
How long does it take to deep clean leather car seats?
It depends on how dirty they are, but usually, it takes around 1 to 2 hours for a full interior. Add a little more time if you’re conditioning and drying too.
Is it okay to use baby wipes on leather seats?
Baby wipes may seem harmless, but many contain alcohol or additives that dry out leather. It’s safer to use a damp microfiber cloth or leather-specific wipes.
How often should I condition my leather seats?
Every 3 to 4 months is ideal. If you live in a hot or dry climate, you might want to condition more often to prevent cracking and fading.
Can I use coconut oil or olive oil as a leather conditioner?
I wouldn’t recommend it. While they might make leather look shiny at first, they can attract dirt and eventually lead to a sticky, greasy surface. Use products made for automotive leather.
How do I remove ink stains from leather seats?
Act quickly. Use a leather-safe ink remover or mild rubbing alcohol on a cotton swab. Dab gently and test a small spot first. If unsure, contact a professional.
Why does my leather still feel sticky after cleaning?
This could be due to leftover cleaner residue or over-conditioning. Wipe it down with a clean, damp cloth and let it dry fully. Buff with a dry cloth afterward.
Hi, I’m Melvin, an automobile engineer with extensive experience in automobile equipment. I currently work for a local automobile firm, where I specialize in the car parts industry. I’ve had the opportunity to collaborate with seasoned inspectors, gaining invaluable hands-on experience that goes beyond just theory.
My passion for automotive care started at a young age, which led me to create CarSpareCare. Through CarSpareCare, I share the knowledge and skills I’ve acquired over the years to help others navigate the world of car maintenance and repairs.
My goal is to provide practical tutorials, essential safety advice, and the latest industry insights so that anyone—whether a beginner or an expert—can confidently tackle their automotive projects.