Have you ever reached to open your car door from the inside, only to find the handle loose, stuck, or just not working? It’s frustrating, isn’t it? If you’re wondering, “How do I fix a car door handle interior?” you’re in the right spot. I’ve been there, wrestling with a floppy handle on my old sedan, and I’ve spent plenty of time in my garage figuring out how to make it right.
I’ve fixed door handles on my cars, helped friends, and learned the tricks to get the job done without a trip to the mechanic. I’m excited to share my experience with you, so you can tackle this repair with confidence.

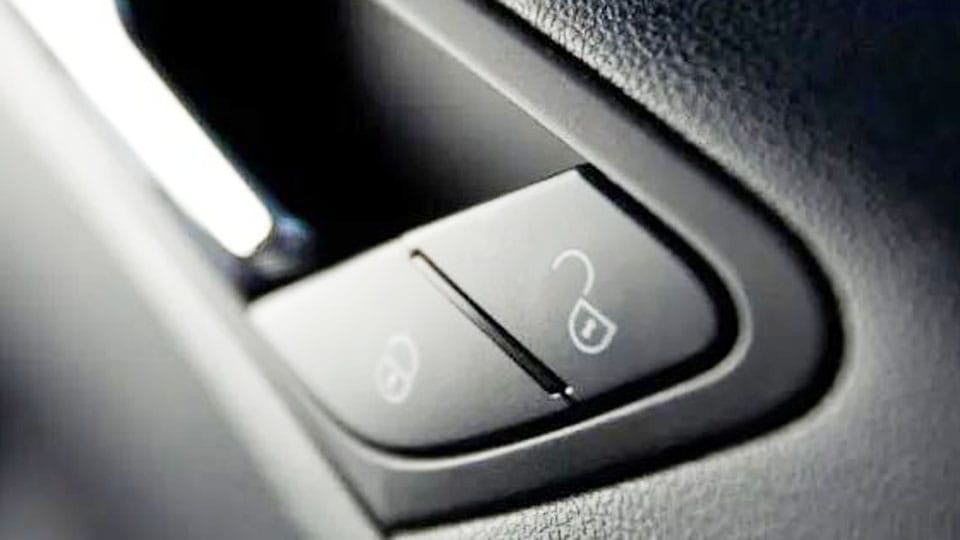
Photo by ifixit
Why Do Interior Car Door Handles Break?
Interior car door handles take a lot of abuse. You pull on them every time you get in or out, and over time, parts wear out. The handle itself is usually plastic, connected to a metal or plastic mechanism inside the door that releases the latch. Common reasons for failure include:
- Worn Plastic: The handle or its pivot points crack or snap from repeated use.
- Loose Connections: Screws or clips holding the handle loosen, making it wobbly.
- Broken Linkage: The rod or cable connecting the handle to the latch breaks or disconnects.
- Stuck Latch: The door latch mechanism gets gummed up or fails, so the handle feels stuck.
- High Mileage: Older cars (100,000+ miles) see more wear on these parts.
I noticed this on my 2008 Honda when the driver’s handle got loose after years of yanking. Knowing the cause helps you figure out what to fix, so let’s get ready to dive in.
Tools and Supplies You’ll Need
Before we start, you’ll need some tools. I keep a toolbox handy for jobs like this, and most of these are probably in your garage. Here’s what I use:
- Screwdrivers: Phillips and flathead for removing screws and prying panels.
- Trim Removal Tool: Plastic tools to pop off the door panel without scratches.
- Socket Set or Wrench: For bolts holding the handle or panel.
- Replacement Handle: Get one for your car’s make, model, and year (about $10-$50 online or at auto parts stores).
- Lubricant: WD-40 or silicone spray for sticky latches.
- Rags: To clean up and catch small parts.
- Gloves: To keep your hands clean and avoid cuts.
- Optional: Torx Bits: Some cars use Torx screws.
- Optional: Clip Pliers: For stubborn door panel clips.
I ordered a replacement handle for my car on Amazon, and it was an exact match. Check your owner’s manual or ask at an auto parts store to ensure you get the right part. Having everything ready makes the job smoother.
Preparing to Fix the Door Handle
Before you touch the door, set up your workspace. I learned to prep after dropping screws in my car’s carpet one too many times. Here’s how I do it:
- Park on a Flat Surface: Make sure the car is stable and the door can open fully.
- Turn Off the Car: Disconnect the battery if you’re working near power window controls to avoid shocks.
- Clear the Door: Remove any items from the door pocket or armrest.
- Work in Good Light: Use a flashlight or work in a well-lit garage to see small parts.
- Protect the Interior: Lay a towel or rag over the door sill to avoid scratching paint.
I set up in my driveway on a sunny day, and it made spotting tiny clips so much easier. Prepping takes 5 minutes but saves frustration later.
Removing the Door Panel
To fix the interior handle, you need to get inside the door, which means removing the door panel. This was intimidating the first time I tried it, but it’s straightforward once you know how. Here’s my step-by-step:
- Find Screws: Look for screws around the handle, armrest, or along the panel’s edges. Check under plastic caps or in the door pocket.
- Remove Screws: Use a Phillips screwdriver to take them out. Keep them in a cup so they don’t roll away.
- Pry Off the Panel: Use a trim removal tool or flathead screwdriver (carefully) to pop the panel off. Start at the bottom and work up, releasing plastic clips.
- Lift the Panel: Once clips are loose, lift the panel up and off the door frame. It may catch on the lock knob.
- Disconnect Wires: Unplug any power window or lock connectors. Press the release tab and pull gently.
- Set Panel Aside: Place the panel somewhere safe to avoid scratching it.
I popped the panel off my sedan in about 10 minutes. Be gentle with the clips—they can break. If you hear a snap, don’t panic; replacement clips are cheap at auto parts stores.
Diagnosing the Door Handle Problem
With the panel off, you can see the handle and its mechanism. I always take a moment to figure out what’s wrong before grabbing tools. Here’s how I diagnose:
- Inspect the Handle: Look for cracks, broken plastic, or loose pivot points. Wiggle it to check for play.
- Check the Linkage: Find the rod or cable connecting the handle to the latch. Pull it gently to see if it moves the latch.
- Test the Latch: Use a screwdriver to manually move the latch mechanism. It should release smoothly.
- Look for Loose Parts: Check for loose screws, clips, or disconnected rods.
- Feel for Stickiness: If the handle or latch feels gummy, it might need cleaning.
On my car, the handle’s plastic pivot was cracked, making it flop uselessly. Sometimes, it’s just a loose screw or disconnected rod, which is an easy fix. Knowing the issue guides your repair.
Fixing a Loose or Wobbly Door Handle
If the handle is loose but not broken, tightening it might do the trick. I’ve fixed wobbly handles this way on a friend’s SUV. Here’s how:
- Locate Mounting Screws: Find the screws or bolts holding the handle to the door. They’re usually behind the panel or under a small cover.
- Tighten Screws: Use a screwdriver or wrench to snug them up. Don’t overtighten, or you’ll strip the threads.
- Check Clips: Ensure any plastic clips or retainers are secure. Push them back into place if loose.
- Test the Handle: Pull the handle to see if it feels firm and opens the door smoothly.
- Lubricate if Needed: Spray a little silicone lubricant on the pivot points if it’s still stiff.
This took me 10 minutes on the SUV, and the handle was good as new. If tightening doesn’t work, the handle or linkage might be broken, so let’s move on.
Replacing a Broken Door Handle
If the handle is cracked or snapped, you’ll need to replace it. This is the most common fix I’ve done, and it’s not too hard. Here’s my process:
- Remove the Old Handle: Unbolt the handle from the door (usually 1-2 screws or bolts). Pop off any clips or rods connected to it.
- Disconnect the Linkage: Note how the rod or cable attaches to the handle. Snap or slide it off carefully.
- Install the New Handle: Attach the rod or cable to the new handle, matching the old setup. Clip or slide it into place.
- Bolt It In: Secure the new handle with screws or bolts. Tighten firmly but not too hard.
- Test the Mechanism: Pull the handle to ensure it moves the latch and opens the door.
- Lubricate: Spray silicone lubricant on the handle’s pivot and linkage for smooth operation.
I replaced my sedan’s handle in about 20 minutes, and it felt sturdy again. Double-check the linkage connection—it’s easy to misalign, which stops the handle from working.
Fixing a Stuck or Faulty Door Latch
The handle works, but the door won’t open because the latch is stuck. I ran into this on my truck when the latch got gunked up. Here’s how I fix it:
- Locate the Latch: Find the latch mechanism inside the door, near the edge where the door closes.
- Clean the Latch: Spray WD-40 or brake cleaner on the latch to loosen dirt or rust. Work it with a screwdriver to free it up.
- Lubricate: Apply silicone spray or white lithium grease to the latch for smooth movement.
- Test the Linkage: Pull the handle or rod to see if the latch releases. If not, check for a broken or disconnected rod.
- Replace if Broken: If the latch is damaged, unbolt it (usually 2-3 screws) and install a new one (about $20-$50).
Cleaning the latch fixed my truck’s door in 15 minutes. If the latch is broken, replacement is trickier, so consider a mechanic if you’re unsure.
Reassembling the Door Panel
Once the handle is fixed, it’s time to put the door back together. I’ve learned to be patient here to avoid breaking clips. Here’s how:
- Reconnect Wires: Plug in any power window or lock connectors.
- Align the Panel: Slide the panel onto the lock knob and line up the clips with their holes.
- Press Clips In: Push the panel firmly to snap the clips into place. Start at the top and work down.
- Install Screws: Screw in all the bolts you removed, including those around the handle or armrest.
- Test Everything: Pull the handle, check the locks, and test power windows to ensure nothing’s loose.
- Replace Covers: Snap any plastic caps or covers back over screws.
I reassembled my sedan’s door in 10 minutes, and it looked untouched. If a clip breaks, grab spares at an auto parts store—they’re cheap.
Testing the Repair
Before you call it done, test the repair thoroughly. I always do this to avoid redoing the job. Here’s my checklist:
- Open the Door: Pull the handle several times to ensure it releases the latch smoothly.
- Check from Outside: Make sure the exterior handle still works and the door locks properly.
- Test Power Features: If your door has power windows or locks, confirm they function.
- Listen for Rattles: Close the door and drive a short distance to check for loose parts or noises.
- Inspect Alignment: Ensure the panel sits flush with no gaps or wobbly bits.
I drove around the block after fixing my handle, and it worked like a charm. If something’s off, pop the panel off and double-check the linkage or screws.
Common Interior Door Handle Problems and Fixes
To make it easy, here’s a table summarizing the issues I’ve seen and how to fix them:
| Problem | Symptoms | Fix |
|---|---|---|
| Loose Handle | Wobbly, moves too much | Tighten screws, secure clips |
| Broken Handle | Cracked, doesn’t move latch | Replace with new handle |
| Stuck Latch | Handle pulls but door won’t open | Clean and lubricate, or replace latch |
| Disconnected Linkage | Handle feels empty, no resistance | Reattach rod or cable |
| Worn Mechanism | Handle works but feels sloppy | Replace handle or linkage components |
This table is my cheat sheet for diagnosing handle issues. It helps me zero in on the problem fast.
Preventing Future Door Handle Problems
Nobody wants to fix the same handle twice, so let’s talk prevention. I’ve learned a few habits to keep handles working longer:
- Be Gentle: Pull the handle smoothly, not like you’re yanking a stuck drawer.
- Lubricate Regularly: Spray silicone lubricant on the latch and handle pivot every 6 months.
- Check Screws: Tighten panel screws during routine maintenance to prevent loosening.
- Clean the Door: Wipe down the handle and panel to avoid dirt buildup in the mechanism.
- Inspect Linkage: Peek inside the door during other repairs to catch wear early.
I started lubricating my truck’s handles yearly, and they’ve stayed solid. These small steps save you from repeat repairs and keep your doors reliable.
When to Call a Professional
Sometimes, fixing a door handle is too tricky for a DIYer. I know my limits and when to call a pro. Here’s when I’d get help:
- Complex Mechanisms: Some luxury or newer cars have intricate latches or electronic handles.
- Broken Latch: Replacing a latch is tough if it’s rusted or hard to access.
- No Tools: You need trim tools and patience to avoid breaking clips or panels.
- Persistent Issues: If the door still won’t open after your fix, there might be a deeper problem.
I sent my friend’s BMW to a shop when the handle was tied to a complex lock system. It cost $150 but saved the door. Expect $100-$300 for professional work, depending on the car.
Why Fixing Your Door Handle Matters
A broken interior door handle isn’t just annoying—it’s a safety issue. If you can’t open the door from inside, you might be trapped in an emergency, like a crash or fire. I’ve felt the panic of a stuck door, and it’s no joke. A faulty handle also makes daily driving a hassle, forcing you to roll down windows or climb over seats.
Fixing it yourself saves money (shops charge $100-$300) and feels empowering. I love the satisfaction of opening a door smoothly after a repair—it’s like giving your car a high-five. Plus, a working handle keeps your car functional and safe for you and your passengers.
Conclusion
There you have it—everything I’ve learned about how to fix a car door handle interior. Whether it’s tightening a loose screw, replacing a broken handle, or freeing a stuck latch, you now have the steps to make your door work like new. I’ve loved tackling these repairs in my garage, turning frustration into triumph with a few tools and some patience. From popping off the door panel to testing that smooth handle pull, this project is a great way to save money and feel like a car pro.
FAQs
How do I know if my car door handle is broken or just loose?
If the handle wobbles or feels sloppy, it’s likely loose—tighten screws or clips. If it’s cracked or doesn’t open the door, it’s broken and needs replacing.
Can I fix a car door handle without removing the door panel?
Rarely. Most fixes require accessing the handle’s screws or linkage inside the door, which means removing the panel.
How much does it cost to fix an interior car door handle?
DIY costs $10-$50 for a new handle. A shop charges $100-$300, including parts and labor, depending on the car.
Is it safe to drive with a broken interior door handle?
It’s risky. A broken handle can trap you inside during an emergency, so fix it as soon as possible.
How long does it take to fix a car door handle interior?
DIY takes 30-60 minutes, depending on the issue and your experience. Pros can do it in 1-2 hours.
Hi, I’m Melvin, an automobile engineer with extensive experience in automobile equipment. I currently work for a local automobile firm, where I specialize in the car parts industry. I’ve had the opportunity to collaborate with seasoned inspectors, gaining invaluable hands-on experience that goes beyond just theory.
My passion for automotive care started at a young age, which led me to create CarSpareCare. Through CarSpareCare, I share the knowledge and skills I’ve acquired over the years to help others navigate the world of car maintenance and repairs.
My goal is to provide practical tutorials, essential safety advice, and the latest industry insights so that anyone—whether a beginner or an expert—can confidently tackle their automotive projects.