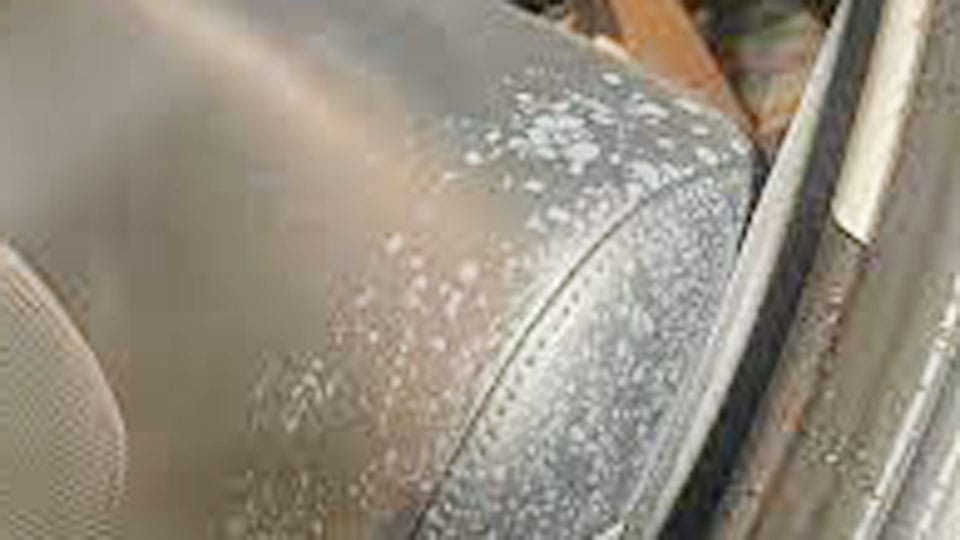
A few months ago, I parked my car near a construction site—just for a couple of hours while visiting a friend. When I came back, everything seemed fine from the outside. Once I opened the door and stepped in, there it was—cement dust everywhere inside my car. On the seats, dashboard, floor mats, and even in the air vents. It looked like my car had been sitting inside a cement mixer.

Photo by dubizzle
I realized how stubborn and damaging cement dust can be when it settles inside a car. It’s not like regular dust that you can wipe away in seconds. Cement particles are gritty, abrasive, and if you’re not careful, they can scratch, stain, or even permanently damage your car’s interior.
If you’ve found yourself in the same situation, don’t worry. I’ll walk you through everything I did—step by step—to safely and effectively remove cement dust from my car’s interior. I’ll also share the tools I used, some do’s and don’ts, and a few extra tips to help prevent this mess from happening again.
Why Cement Dust Is a Serious Problem Inside Your Car
Before jumping into the removal process, it’s important to understand why cement dust isn’t like any regular household or road dust.
Cement dust is made of tiny, fine particles of concrete, lime, and sometimes silica. These particles:
- Are highly alkaline (can cause surface damage)
- Can scratch soft surfaces like plastics and leather
- Can dry out fabric if left too long
- May cause breathing issues when stirred into the air
That’s why it’s best not to ignore it or delay the cleanup.
Essential Tools and Materials You’ll Need
Here’s a quick list of what I used to get rid of the cement dust from my car interior. You may already have some of these at home:
| Tool or Material | Purpose |
|---|---|
| Soft-bristle interior brush | Loosens dust from fabric and seams |
| Microfiber cloths | Wipes surfaces without scratching |
| Handheld or shop vacuum | Sucks up loose dust effectively |
| Spray bottle with water | Dampens surfaces to prevent airborne dust |
| Mild pH-neutral cleaner | Safely cleans without reacting with cement |
| Upholstery cleaner | For fabric or carpeted areas |
| Leather cleaner/conditioner | For leather seats and trims |
| Compressed air (optional) | Blows dust out of vents and tight corners |
| Face mask and gloves | For personal safety during heavy cleaning |
You don’t have to use everything, but these made the job much easier and safer for me.
Start with Safety First
Cement dust isn’t just a nuisance—it can irritate your eyes, nose, and lungs. Here’s what I suggest before you start cleaning:
- Wear a mask to avoid inhaling fine dust.
- Use gloves to protect your hands.
- Open the car doors and windows for ventilation.
- If possible, work outside or in a well-aired garage.
Safety first, always.
Step 1: Loosen and Remove the Loose Dust
This is where the real cleaning starts. You need to remove as much loose dust as possible before using any cleaners.
How I Did It:
Dry Vacuum First – I used a handheld vacuum with a crevice tool. I started from the top (dashboard) and worked my way down to the floor mats. This prevents dust from falling back onto already-cleaned surfaces.
Soft Brush Action – For the seats and tricky corners, I gently brushed the surfaces to loosen stuck particles. Then I vacuumed again.
Compressed Air – If dust has gotten into your air vents or seams between panels, a quick blast of compressed air can help. Just make sure to vacuum right after to avoid letting the dust resettle.
Avoid brushing too hard on leather or sensitive plastic—it can scratch easily with cement particles present.
Step 2: Damp Wipe Down
Once the loose dust is gone, the next step is wiping down all interior surfaces. But don’t overdo the moisture—too much water can damage electronics or seep into cracks.
Here’s what worked for me:
- I filled a spray bottle with clean water and lightly misted a microfiber cloth (not the surface).
- I gently wiped down the dashboard, door panels, center console, and steering wheel.
- For fabric seats, I misted and blotted instead of rubbing.
Avoid rubbing cement dust deeper into surfaces—especially on textured plastics or stitched fabric.
Step 3: Treating Fabric, Carpet, and Upholstery
Cement dust loves to settle deep into fibers. This part took me the longest, but it was worth it.
How I Cleaned Fabric Areas
- I used an upholstery cleaner designed for automotive interiors.
- I sprayed a light mist onto the surface (like the floor mats and seats).
- Using a soft brush, I gently agitated the surface to bring up the dust.
- Then, I used a clean microfiber towel to blot away residue.
After it dried, I vacuumed again to remove any dried particles that came to the surface.
Step 4: Cleaning Leather and Vinyl
If your car has leather seats or vinyl trims, the cleaning process is slightly different.
What I Did
- I used a dedicated leather cleaner with a soft applicator pad.
- Cleaned in small sections using circular motions.
- Followed up with a leather conditioner to keep the surface hydrated.
Vinyl surfaces? A light mist of interior cleaner and a microfiber cloth did the trick. It’s best to avoid alcohol-based cleaners here—they can dry out the material.
Step 5: Cleaning Air Vents and Electronics
These areas are delicate but often packed with dust. Here’s how I tackled them:
- For vents, I used compressed air to blow out the dust, then wiped with a small detail brush.
- For touchscreens, I used a damp microfiber cloth and a tiny drop of screen-safe cleaner.
- Buttons and knobs were cleaned with cotton swabs and a gentle all-purpose cleaner.
Never spray cleaner directly on buttons or screens—spray on the cloth first.
Step 6: Final Touches and Odor Removal
Once everything was visibly clean, I focused on making the interior feel fresh again.
Here’s what helped
- I left an open box of baking soda under the seat overnight.
- Sprayed a light, non-overpowering fabric-safe air freshener.
- Let the car air out completely before closing it up.
The cement smell wasn’t strong, but a full cleanup helped bring back that “clean car” vibe.
How to Prevent Cement Dust from Getting In Again
After going through this, I made a few changes to avoid repeating the mess.
Here’s what I recommend:
| Prevention Tip | Why It Works |
|---|---|
| Park away from construction zones | Avoids airborne dust from settling |
| Use window shades | Helps block dust when windows are cracked |
| Keep windows rolled up | Obvious but easy to forget |
| Add seat covers and mats | Easier to clean or replace if dust returns |
| Install cabin air filters | Keeps dust from entering the HVAC system |
Being proactive saved me from having to deep clean again too soon.
Conclusion
If you’re wondering how to remove cement dust from car interior, I hope my step-by-step guide gives you exactly what you need.
From the first vacuum to the final freshening spray, each step plays a big role in protecting your car’s interior from lasting damage. Cement dust might seem like a nightmare at first, but with the right approach and tools, it can absolutely be cleaned up.
Just remember: don’t rush it. Take your time, be gentle with each surface, and focus on fully removing the particles without pushing them deeper.
In the end, your car will feel brand new—and you’ll breathe a whole lot easier knowing that stubborn dust is gone for good.
Hi, I’m Melvin, an automobile engineer with extensive experience in automobile equipment. I currently work for a local automobile firm, where I specialize in the car parts industry. I’ve had the opportunity to collaborate with seasoned inspectors, gaining invaluable hands-on experience that goes beyond just theory.
My passion for automotive care started at a young age, which led me to create CarSpareCare. Through CarSpareCare, I share the knowledge and skills I’ve acquired over the years to help others navigate the world of car maintenance and repairs.
My goal is to provide practical tutorials, essential safety advice, and the latest industry insights so that anyone—whether a beginner or an expert—can confidently tackle their automotive projects.