
Quick Summary
A typical car has one crankshaft position sensor. This crucial sensor tells your engine’s computer the exact position and speed of the crankshaft, which is vital for ignition timing and fuel injection. While most cars have just one, a few rare exceptions might exist in complex engines.
How Many Crankshaft Sensors Are In A Car? Your Essential Guide to Engine Timing
Ever heard a strange noise from your engine or seen a warning light flicker on your dashboard and wondered what’s going on? If it has to do with your engine sputtering, not starting, or running rough, a tiny but mighty part called the crankshaft position sensor might be the culprit. It’s a common question for many car owners, especially when you’re trying to understand what might need fixing. You might be thinking, “How many of these critical sensors are actually in my car?” The good news is, it’s usually quite straightforward, and understanding its role can save you time and money. Let’s dive in and demystify the crankshaft sensor, so you feel confident knowing exactly what’s under your hood!
What Does a Crankshaft Position Sensor Do?
The crankshaft position sensor (CKP sensor) is a small but incredibly important component in your car’s engine. Think of it as the engine’s conductor, or its timing guru. Its main job is to monitor the rotational speed and position of the crankshaft. The crankshaft is the central shaft that converts the up-and-down motion of the pistons into rotational motion, which ultimately powers your wheels.
The CKP sensor sends this information to the engine control module (ECM), also known as the engine control unit (ECU) or powertrain control module (PCM). The ECM is the brain of your engine. It uses the data from the CKP sensor, along with information from other sensors, to precisely control:
- Ignition Timing: When the spark plugs fire to ignite the fuel-air mixture. Getting this timing right is essential for smooth engine operation and maximum power.
- Fuel Injection: When and how much fuel is injected into each cylinder. Accurate timing ensures efficient combustion and good fuel economy.
- Other Engine Functions: It helps manage idle speed, emissions control, and other vital processes.
Without accurate signals from the crankshaft position sensor, the ECM wouldn’t know what the engine is doing, and it would struggle to keep things running. This is why a faulty CKP sensor can cause a wide range of drivability issues.
How Many Crankshaft Sensors Are Typically Found in a Car?
For the vast majority of modern gasoline and diesel passenger cars, the answer is simple: one. Most vehicles are equipped with a single crankshaft position sensor.
This single sensor is strategically placed to read a reluctor wheel (also known as a tone ring or trigger wheel) attached to the crankshaft. This wheel has teeth or notches that the sensor detects as it rotates. By counting these teeth and measuring the time between them, the sensor feeds the ECM with the exact speed and angle of the crankshaft at any given moment.
While one is the standard, there are rare exceptions, particularly in some high-performance, racing, or very complex industrial engines. These might have multiple CKP sensors for redundancy (backup) or to monitor different areas of the crankshaft for more precise control. However, for everyday cars you’ll find in your driveway, assume it’s just one.
You can often find detailed information about your specific vehicle’s sensor setup in your owner’s manual or by looking up your car’s repair manual online.
Why Your Car Only Needs One Crankshaft Position Sensor
The technology used in modern engines is incredibly sophisticated. The ECM is designed to work efficiently with the data provided by a single CKP sensor. Early engine management systems might have used multiple sensors or a different system, but advancements have streamlined this. The current design, with one CKP sensor, is reliable and cost-effective for manufacturers.
The reluctor wheel on the crankshaft typically has many teeth (often 60-2) with one or two missing teeth. This missing tooth (or teeth) acts as a reference point, allowing the CKP sensor and ECM to determine Top Dead Center (TDC) for cylinder #1, which is crucial for initiating the combustion cycle. The ECM counts the teeth passing the sensor and uses the unique pattern of missing teeth to pinpoint the exact position.
This sophisticated system means that a single, well-placed sensor can provide all the necessary data for the engine control module to manage the engine’s timing and fueling with extreme accuracy. Redundancy, while offering extra safety in critical applications like aircraft engines, is generally not necessary for typical automotive use and would add unnecessary complexity and cost.
Signs of a Failing Crankshaft Position Sensor
When a CKP sensor starts to fail, it can cause a variety of symptoms. These can range from minor annoyances to situations where your car becomes undrivable. Recognizing these signs can help you address the problem before it gets worse.
Here are some common symptoms of a failing crankshaft position sensor:
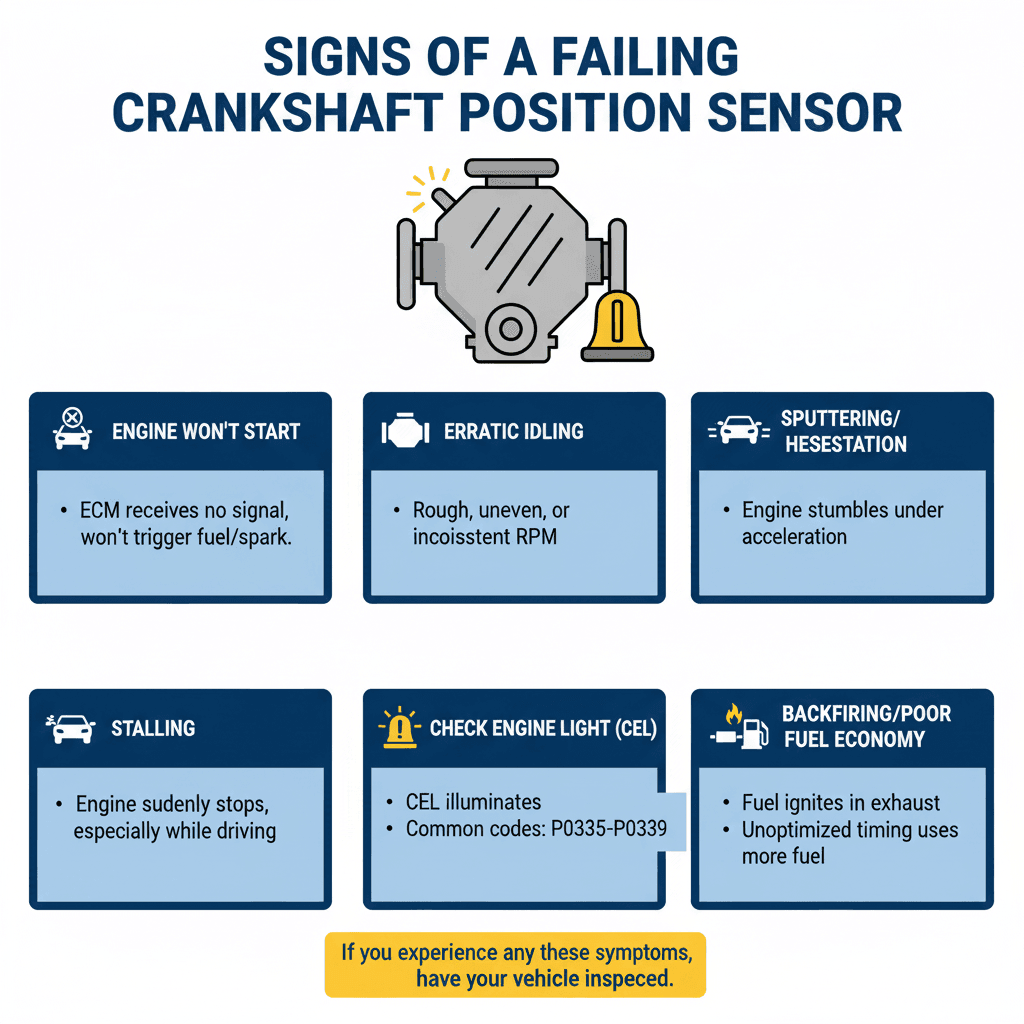
- Engine Won’t Start: This is one of the most common signs. If the ECM doesn’t receive any signal from the CKP sensor, it won’t know if the engine is rotating or in what position, and therefore won’t trigger the fuel injectors or spark plugs.
- Erratic Engine Idling: The engine might idle roughly, unevenly, or at an inconsistent speed.
- Sputtering or Hesitation: The engine may stumble or hesitate when you accelerate, as the ECM struggles to maintain proper timing and fuel delivery.
- Stalling: The engine might suddenly stop running, especially while you’re driving or at a stoplight.
- Check Engine Light (CEL) is On: A failing CKP sensor will almost always trigger the Check Engine Light. The trouble code will often point to the CKP sensor circuit or performance. Common codes include P0335, P0336, P0337, P0338, P0339, etc.
- Backfiring: In some cases, incorrect ignition timing can lead to fuel igniting in the exhaust system, causing backfiring.
- Poor Fuel Economy: While not the primary symptom, an engine running on unoptimized timing can consume more fuel.
If you experience any of these symptoms, it’s a good idea to have your vehicle inspected. A malfunctioning CKP sensor can leave you stranded.
What Affects a Crankshaft Position Sensor?
Like any automotive component, CKP sensors are subject to wear and tear, as well as external factors. Understanding what can cause them to fail can help you better care for your vehicle.
Factors that can affect a crankshaft position sensor include:
- Heat: The engine bay is a hot environment. Extreme temperatures over time can degrade the sensor’s components, including its wiring and internal electronics.
- Vibration: Constant engine vibration, especially if your engine mounts are worn, can lead to physical stress on the sensor and its wiring harness, potentially causing cracks or loose connections.
- Oil and Contaminants: While the sensor itself is usually well-sealed, oil leaks, coolant spills, or other automotive fluids can drip onto the sensor or its connector. Over time, these can degrade plastic parts or interfere with electrical connections.
- Electrical Issues: Short circuits, open circuits, or voltage spikes in the vehicle’s electrical system can damage the sensor’s internal circuitry.
- Physical Damage: During other engine repairs or maintenance, the sensor or its wiring can be accidentally damaged if not handled carefully.
- Manufacturing Defects: Although less common, a sensor can sometimes fail due to a defect from the factory.
- Wear on the Reluctor Wheel: While the CKP sensor itself is the most common failure point, damage or wear to the reluctor wheel (the toothed wheel on the crankshaft) can also cause improper readings or sensor failure. This is much rarer.
Regular maintenance and addressing fluid leaks promptly can help prolong the life of your CKP sensor.
How to Locate the Crankshaft Position Sensor
Locating the CKP sensor can vary depending on your car’s make and model. However, it’s typically found mounted on the engine block, near the crankshaft pulley or flywheel.
Here are some common locations:
- Near the Crankshaft Pulley: It’s often bolted to the engine block on the front of the engine, close to the large pulley at the bottom that the serpentine belt wraps around.
- Bell Housing Area: On rear-wheel-drive vehicles, it might be located on the transmission bell housing, where the engine connects to the transmission. It would be positioned to read a reluctor wheel on the flywheel.
- Lower Engine Block: Sometimes it’s mounted lower down on the engine block, looking upwards towards the crankshaft or flywheel.
Its position is always such that it can accurately “see” the reluctor wheel on the crankshaft or the flywheel. You’ll usually find a wire connector attached to it.
Pro Tip: Consult your vehicle’s repair manual (a Haynes, Chilton, or factory service manual is best) for the exact location. These manuals provide diagrams and specific instructions for your car model. You can often find these manuals online if you don’t have a physical copy.
Checking and Testing a Crankshaft Position Sensor
Testing a CKP sensor usually requires some basic automotive tools and electrical knowledge. While it’s possible to diagnose it at home, if you’re not comfortable with electrical testing, it’s best to leave this to a professional mechanic.
Here’s a general overview of how it might be tested:
Tools You Might Need:
- Multimeter (Digital is best)
- OBD-II Scanner (for checking trouble codes and live data)
- Socket Set and Wrenches
- Repair Manual for your vehicle
- Safety Glasses and Gloves
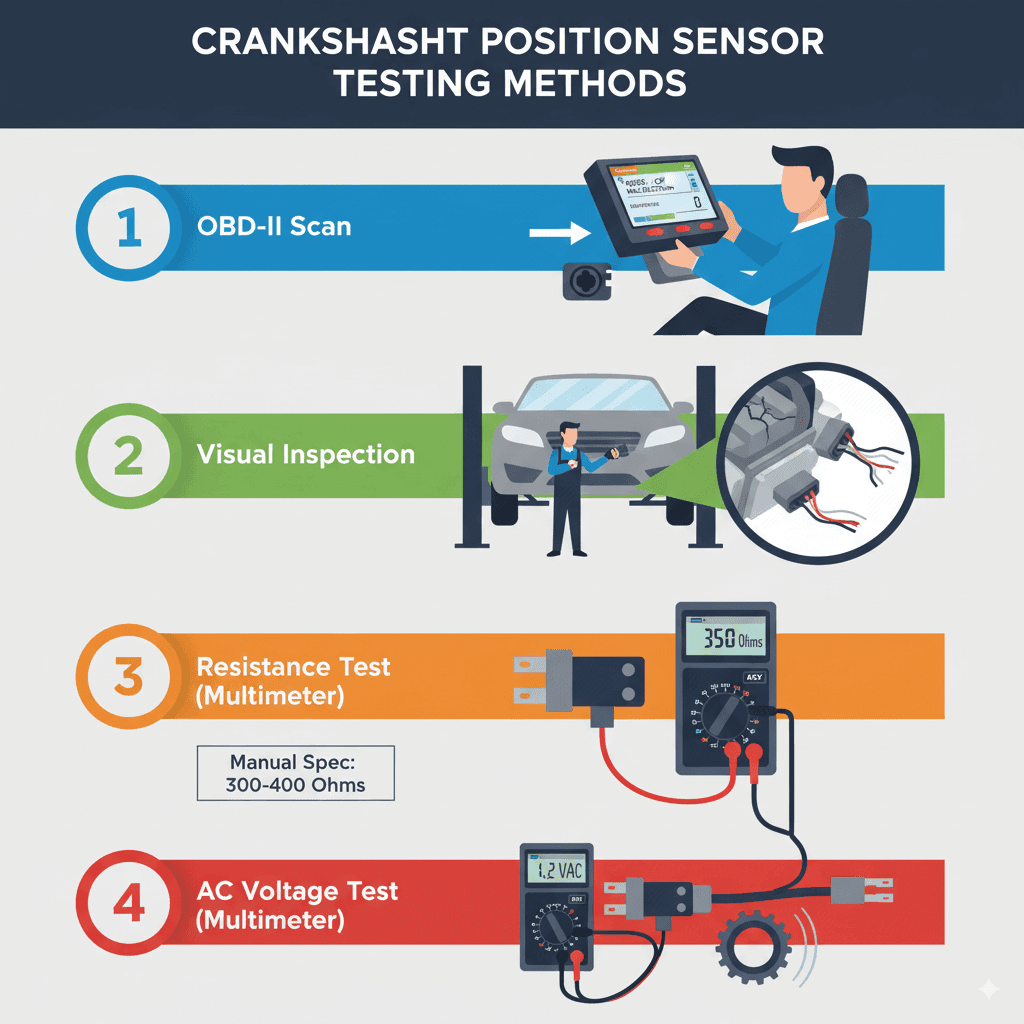
Testing Methods:
- OBD-II Scan:
- Connect an OBD-II scanner to your car’s diagnostic port (usually under the dashboard on the driver’s side).
- Check for any trouble codes. Codes related to the CKP sensor (e.g., P0335) are a strong indicator of a problem.
- Observe live data. You can often see the engine RPM reading from the CKP sensor. If the RPMs jump erratically, read zero when the engine is running, or display oddly, it suggests a sensor issue.
- Visual Inspection:
- Safely lift the vehicle and locate the CKP sensor (refer to your manual).
- Inspect it for any visible damage, cracks, or corrosion.
- Check the wiring harness and connector for loose connections, frayed wires, or signs of damage from heat or abrasion.
- Resistance Test (Multimeter):
- Disconnect the CKP sensor connector.
- Consult your repair manual for the correct resistance values for your specific sensor.
- Set your multimeter to the Ohm setting (resistance).
- Touch the multimeter probes to the sensor’s terminals (refer to your manual for which terminals).
- Compare the readings with the specified values. If the resistance is out of spec (too high, too low, or infinite/open circuit), the sensor is likely faulty.
- AC Voltage Test (Multimeter):
- Reconnect the sensor connector.
- Set your multimeter to AC Voltage (VAC) and a suitable range (e.g., 20V AC).
- Connect the probes to the sensor connector while it’s reconnected by carefully back-probing the terminals (this requires a scan tool that can also read RPMs simultaneously to verify). Alternatively, some guides suggest disconnecting the sensor and connecting the probes to the harness side, then briefly cranking the engine. The sensor should generate a small AC voltage signal as the crankshaft turns.
- Crank the engine for a few seconds. You should see a fluctuating AC voltage reading. If there’s no voltage or a very weak, erratic signal, the sensor may be bad.
Important Note: Always disconnect the vehicle’s battery before unplugging or connecting electrical components to prevent short circuits or damage. Be cautious when working around moving engine parts. Never test a sensor while the engine is running unless specified by the repair manual and you are experienced.
Replacing a Crankshaft Position Sensor
Replacing a CKP sensor is a moderately difficult DIY job. It requires some mechanical aptitude and the right tools. If you’ve successfully performed other basic repairs, you might be able to tackle this.
Step-by-Step Replacement Guide (General):
- Gather Your Tools and Parts: Ensure you have the correct replacement sensor for your vehicle’s make, model, and year, along with the necessary tools (sockets, wrenches, possibly a torque wrench, and a way to access the sensor).
- Locate the Sensor: As discussed earlier, find the CKP sensor on your engine.
- Disconnect Battery: For safety, disconnect the negative terminal of your car battery.
- Access the Sensor: You may need to remove other components to get clear access to the sensor. This could include splash shields, engine covers, or even accessories like the alternator.
- Disconnect Electrical Connector: Carefully unclip and disconnect the electrical connector from the CKP sensor.
- Remove the Old Sensor: Typically, the sensor is held in place by one or two bolts. Use the appropriate socket or wrench to loosen and remove these bolts.
- Remove the Sensor: Once the bolts are out, the sensor may slide out of its bore. If it’s stuck, you might need to gently pry it or tap it with a rubber mallet. Be careful not to damage the surrounding engine block.
- Prepare the New Sensor: Your new sensor may come with a new O-ring or gasket. Ensure it’s properly seated. Some mechanics recommend not lubricating the new sensor unless the manual specifies, as it can interfere with its function or attract debris.
- Install the New Sensor: Insert the new CKP sensor into its bore on the engine block.
- Reinstall Bolts: Reinstall the mounting bolt(s). Tighten them to the torque specification recommended in your repair manual. Overtightening can damage the sensor or block, while undertightening can lead to leaks or an insecure mounting.
- Reconnect Electrical Connector: Plug the electrical connector securely back into the new sensor. Ensure it clicks into place.
- Reinstall Removed Components: Reassemble any parts you removed to access the sensor.
- Reconnect Battery: Reconnect the negative terminal of the car battery.
- Start the Engine: Start your car and check if the Check Engine Light is off. Listen to the engine to ensure it’s running smoothly.
- Test Drive: Take the car for a test drive to confirm the issue is resolved and there are no new problems.
Important Safety Consideration: If you’re unsure about any step, or if you don’t have the right tools, it’s always best to have a qualified mechanic perform the replacement. Working on your car can be dangerous if not done correctly.
Comparing CKP Sensors: OEM vs. Aftermarket
When it comes to replacing your CKP sensor, you’ll likely encounter options from Original Equipment Manufacturer (OEM) suppliers and aftermarket brands. Each has its pros and cons.
| Feature | OEM (Original Equipment Manufacturer) | Aftermarket |
|---|---|---|
| Quality & Fitment | Designed specifically for your car model, ensuring perfect fit and function. Highest quality materials. | Quality can vary widely. Some are excellent, others may have fitment issues or lower durability. |
| Reliability | Generally very reliable and long-lasting. Built to manufacturer standards. | Varies by brand. Reputable aftermarket brands offer good reliability, but cheaper options may fail sooner. |
| Price | Typically more expensive. | Often significantly less expensive, offering cost savings. |
| Availability | Available through dealerships or authorized parts distributors. | Widely available at auto parts stores, online retailers, and service centers. |
| Warranty | Usually comes with a manufacturer’s warranty. | Warranty policies vary greatly by brand. |
Recommendation: For critical components like the CKP sensor, using an OEM part is often recommended for guaranteed reliability and performance. However, if you choose an aftermarket sensor, opt for a component from a well-respected brand known for quality and durability. Always check customer reviews and warranty information.
Did you know that the National Highway Traffic Safety Administration (NHTSA
Hi, I’m Melvin, an automobile engineer with extensive experience in automobile equipment. I currently work for a local automobile firm, where I specialize in the car parts industry. I’ve had the opportunity to collaborate with seasoned inspectors, gaining invaluable hands-on experience that goes beyond just theory.
My passion for automotive care started at a young age, which led me to create CarSpareCare. Through CarSpareCare, I share the knowledge and skills I’ve acquired over the years to help others navigate the world of car maintenance and repairs.
My goal is to provide practical tutorials, essential safety advice, and the latest industry insights so that anyone—whether a beginner or an expert—can confidently tackle their automotive projects.

