Yes, you can paint car wheels at home if they are straight, clean, and free of structural damage; curb-bent, cracked, or heavily corroded wheels should be repaired or replaced instead. Bad prep or painting the wrong wheel can cause peeling, brake-dust staining, imbalance, and wasted time and materials. This guide shows which wheels are safe to paint, which are not, and the step-by-step home process for alloy and steel wheels.
Can you paint alloy wheels at home?

Yes. Alloy wheels are common DIY repaint candidates when the damage is cosmetic only and the finish is still sound. They need sanding, primer, wheel paint, and clear coat, and they are more forgiving than chrome or color-shifting finishes. Bare aluminum, peeling clear coat, and heavy corrosion raise the risk quickly.
Alloy wheels usually respond well to careful home refinishing because the goal is adhesion and protection, not a show-level restoration. The wheel still has to be straight, balanced, and free of leaks. If the damage reaches the metal deeply, or the finish is failing in large areas, a different repair is the better choice.
What you’ll need
- Wheel cleaner or degreaser
- Brake-dust remover or soap and water
- Sandpaper in 220-800 grit
- Scuff pads for tight areas
- Self-etching primer for metal surfaces
- Wheel-specific paint in an automotive-grade formula
- Clear coat
- Masking tape
- Plastic sheeting or masking film
- Jack and jack stands
- Lug wrench and torque wrench
- Clean microfiber cloths
Should you paint these wheels?
| Wheel condition | Paintable at home | Risk level | Required prep | Better alternative |
|---|---|---|---|---|
| No visible cracks, no bends, light curb rash, intact finish | Yes | Low | Wash, degrease, sand, prime, paint, clear coat | Home repaint |
| Curb rash under about 1 mm deep, no sharp gouges | Yes, with fill and sanding | Moderate | Clean, fill if needed, feather-edge, prime | Professional refinishing if finish quality matters |
| Corrosion only in the top finish, no pitting through metal | Sometimes | Moderate | Strip loose coating, sand to firm edges, prime immediately | Refinish shop for widespread corrosion |
| Visible crack, bend that affects balance or bead seal | No | High | Do not paint until repaired and inspected | Repair or replace |
| Corrosion pitted through the finish, active at lug holes or valve stem | No | High | Repair the damage first | Professional repair or replacement |
| Widespread peeling, bubbling, or lifting from a failed prior finish | No | High | Full strip required before refinishing | Professional strip and refinish |
| Chrome or color-shifting finish | Usually no | High | Special stripping and adhesion system needed | Professional refinishing |
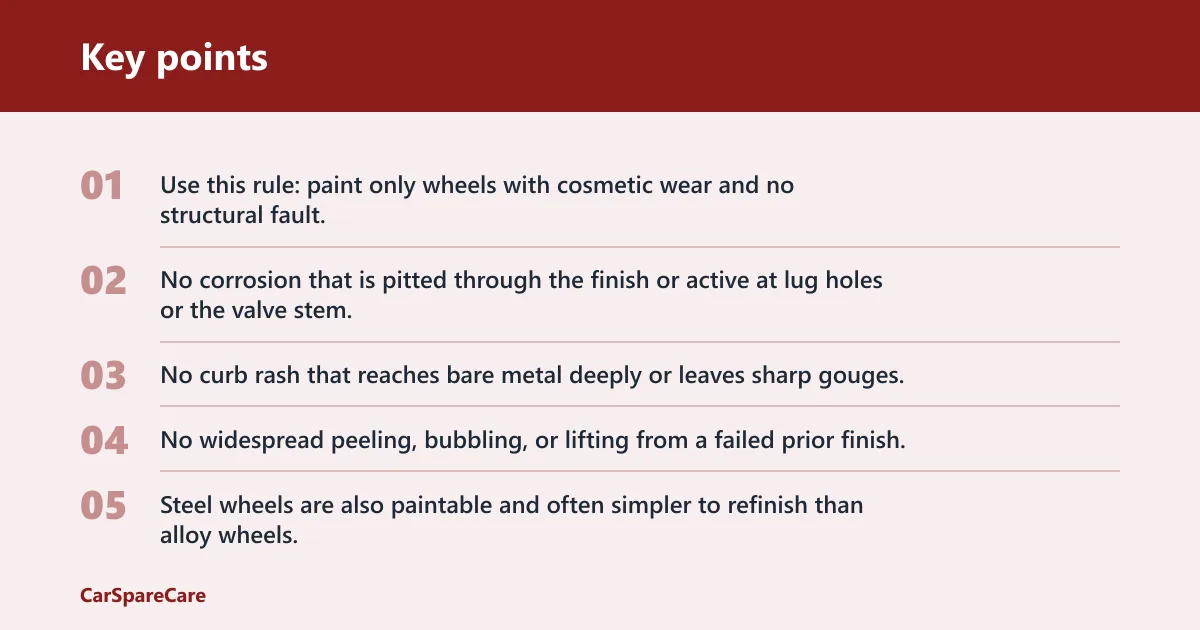
Use this rule: paint only wheels with cosmetic wear and no structural fault. No visible cracks. No bends that affect balance or bead seal. No corrosion that is pitted through the finish or active at lug holes or the valve stem. No curb rash that reaches bare metal deeply or leaves sharp gouges. No widespread peeling, bubbling, or lifting from a failed prior finish.
Steel wheels are also paintable and often simpler to refinish than alloy wheels, but they still need the same adhesion prep and protection. Chrome wheels, bare polished aluminum, and specialty finishes are poor candidates for a simple home repaint because the coating stack is less forgiving and surface prep is harder to get right.

The safest home method is to remove the wheel, clean it thoroughly, sand the existing finish, mask the tire and brake parts, then apply primer, wheel paint, and clear coat in light layers. A weekend is a realistic window if the wheels are in good shape and you let the finish cure before reinstalling.
- Loosen the lug nuts while the car is still on the ground, then raise the car at the service-manual jacking points and support it with jack stands.
- Remove the wheel and set it on a clean, stable surface.
- Wash off brake dust, grease, road film, and silicone residue, then dry the wheel completely.
- Sand the old finish with 220-800 grit so the new coating has mechanical bite.
- Feather any curb rash and remove loose clear coat, but stop if the damage is deep enough to expose a structural issue.
- Mask the tire, valve stem, lug holes, and brake components with tape and plastic sheeting.
- Apply self-etching primer in light coats and let each coat flash per the product label.
- Spray wheel-specific paint in thin coats, keeping each pass even and overlapping slightly.
- Apply clear coat in 2-3 light coats for gloss and chip resistance.
- Let the wheel cure fully before reinstalling it, torquing the lugs, or exposing it to wash water.
Wheel-specific paint matters because it is made for heat and brake dust exposure. Automotive-grade enamel or urethane is the usual fit. Clear coat adds gloss and helps resist chips and fading, but heavy coats trap solvent and raise the risk of runs and soft paint. Thin coats dry better and hold up better.
Say your 18-inch alloy wheel has light curb rash on one spoke and no crack at the rim lip. That wheel is a reasonable home repaint candidate after sanding and priming. Say the same wheel has a hairline crack near a lug hole. Paint is the wrong fix because the wheel needs repair or replacement before any finish work.
Common mistakes
Skipping degreasing and sanding is the fastest route to peeling. Brake dust, wax, and silicone stop adhesion. Loose clear coat causes the same problem, because new paint bonds to the old failure, not the wheel.
Painting too heavily is another common error. Thick coats run, trap solvent, and chip sooner. Painting over a dirty wheel or one with glossy untouched patches gives patchy bite and weak edges, especially around spokes and lug holes.
A common first-timer mistake is painting a tire-mounted wheel with minimal masking. The result is overspray on the sidewall and rough edges at the bead. On-car touch-up can hide the problem for a while, but it rarely gives a clean perimeter.
Can you paint wheels while they are on the car?
Yes, but only as a temporary fix, and the result is usually worse than removing the wheel. Overspray risk is higher, masking is harder, and the edges near the spokes, barrel, and lug holes are more likely to fail. Removal gives better access and cleaner lines.
On-car painting also makes it harder to clean brake dust and to sand evenly behind the spokes. If you must do it, expect a lower-finish result and extra time masking the tire, brake caliper, and body panels. For a durable refinish, take the wheel off the car.
How long does wheel paint need to cure before driving?
Cure time depends on the product and climate, but many wheel paints need about 24 to 72 hours before normal driving. Tire Advise says to allow 24-48 hours of cure time before remounting and driving. Follow the label first, because temperature and humidity can stretch the window.
A practical timeline is simple. Safe to reinstall: after the coating is dry to the touch and the product label allows handling. Safe to torque: after enough cure that the finish will not mark under the lug nuts. Safe to wash: after full cure, which often lands near the longer end of the label’s range.
If the finish still smells strongly of solvent, feels soft, or leaves a fingerprint, wait longer. A painted wheel that is put into service too early can chip at the lug holes and edge lift around the bead seat.
What wheels should not be painted?
Do not paint cracked wheels, bent wheels, or wheels with corrosion that has eaten into the metal. Do not paint a wheel with widespread peeling, bubbling, or lifting and expect the new coating to hold. The failure has to be repaired first or the new paint will follow the old one off.
Chrome wheels, highly polished bare aluminum, and color-shifting finishes are poor fits for a basic home repaint. They need different prep and, in many cases, professional stripping or specialty coating. If the wheel is structurally sound but the finish is too complex for a simple repaint, powder coating or a refinish shop is the cleaner answer.
Steel wheels are the easiest DIY target. Alloy wheels are also workable, but they are more sensitive to leftover brake dust, old clear coat, and edge damage. Bare aluminum and previously clear-coated wheels need careful prep because any contamination shows through quickly.
Is wheel painting worth it or should I pay for powder coating?
Home painting is cheaper and works well for cosmetic refreshes. Powder coating is more durable, but it is usually a professional-only process and costs more. If you want a budget fix for a set of structurally sound wheels, paint is the practical route. If you want a long-lasting finish, powder coating is the stronger choice.
Cost depends on product quality and how much stripping or repair the wheel needs. A basic DIY repaint can run about $40 to $120 per wheel in materials if you already have cleaning supplies and masking items. A better-grade finish with primer, quality wheel paint, and clear coat can raise materials cost to roughly $75 to $175 per wheel.
Professional powder coating is often several hundred dollars for a set, with the final total shaped by wheel size, prep work, and local labor. That price buys a tougher finish, but it is not a home job in the usual sense.
How do you stop wheel paint from peeling or chipping?
Start with clean metal and keep the coats thin. Most peeling comes from contamination, poor sanding, or trying to paint over loose clear coat. Chips often start at lug holes, edges, and the rim lip, where the coating gets the most abuse from tools, road grit, and tire service.
Use self-etching primer on properly prepared metal, then apply wheel-specific paint and clear coat in light passes. Mask the lug area carefully. Let the paint cure fully before mounting, torquing, or washing. A wheel that is handled too soon often fails at the edges first.
Say a steel wheel is painted on Friday night and bolted up Saturday morning in cold weather. That setup invites imprint marks from the lug nuts and later peeling around the holes. Waiting for the full cure window is slower, but it saves the finish.
Frequently asked questions
How do you paint car wheels at home?
Remove the wheel, clean it thoroughly, sand the old finish, mask the tire and brake parts, prime, spray wheel paint, and clear coat. Reinstall only after the finish has dried enough for handling and the product label’s cure window has passed.
Do you need to remove tires before painting wheels?
No, but removing the wheel from the car is the minimum for decent results. Leaving the tire mounted makes masking harder and increases edge failures. For the cleanest finish, separate the tire from the wheel before painting.
What paint should you use on car wheels?
Use automotive-grade wheel paint, ideally enamel or urethane made for heat and brake dust exposure. Drive Quip recommends a primer designed for metal and wheels, and The Tire Reviews recommends automotive-grade enamel or urethane paint. Avoid generic household coatings.
How much does it cost to paint wheels at home?
Powder coating usually costs more and is handled professionally.

Hi, I’m Melvin, an automobile engineer with extensive experience in automobile equipment. I currently work for a local automobile firm, where I specialize in the car parts industry. I’ve had the opportunity to collaborate with seasoned inspectors, gaining invaluable hands-on experience that goes beyond just theory.
My passion for automotive care started at a young age, which led me to create CarSpareCare. Through CarSpareCare, I share the knowledge and skills I’ve acquired over the years to help others navigate the world of car maintenance and repairs.
My goal is to provide practical tutorials, essential safety advice, and the latest industry insights so that anyone—whether a beginner or an expert—can confidently tackle their automotive projects.