Clean leather trim with a pH-balanced leather cleaner, then protect it with a matte leather conditioner or UV protectant. Use a gentle cleaner for light soil, and move to stronger cleaning only when grime shows in grain or seams. Wrong products can leave gloss, residue, harden the surface, or speed up cracking and color fade. This guide shows how to choose the right cleaner and protectant for matte, sun-exposed, and high-touch leather trim.
What you’ll need
- pH-neutral leather cleaner in a spray or foam format, with no added gloss
- Short-pile microfiber cloths, lint-free, with one cloth for cleaning and one for buffing
- Soft detailing brush for stitching, seams, grain, and perforations
- Leather conditioner or protectant that dries to a non-greasy finish
- Vacuum with a soft brush attachment, or a dry microfiber for dust removal
📊 For a broader comparison, The Drive’s best value pick was 303 All Surface Interior Cleaner. Source: Thedrive.
Leather trim care matrix
Use the lightest method that fits the issue. Leather trim often needs less product than seats, especially on door inserts, dash-top accents, and steering-wheel sections where residue shows fast and edges are tight. In practice, a pH-neutral cleaner in the roughly 6 to 8 pH range is the safest starting point for finished automotive leather.
| Scenario | Cleaner type | Applicator | Wipe method | Protection step |
|---|---|---|---|---|
| Light dust | Dry removal only, or a pH-neutral leather cleaner if needed | Short-pile microfiber | Dry wipe, then a second cloth for finish check | Skip conditioner if the trim already feels balanced |
| Body oils and sunscreen transfer | pH-neutral leather cleaner, spray onto cloth | Microfiber plus soft brush for grain | Wipe in straight passes, then buff dry | Apply a light matte conditioner or UV protectant |
| Dry cracking risk | pH-neutral cleaner first, then conditioner | Microfiber cloth; brush only for seams | Wipe fully dry before any protectant | Use a non-greasy conditioner with UV resistance where available |
| Sticky finish | pH-neutral cleaner, repeated lightly if residue remains | Fresh microfiber cloths only | Several dry passes until the touch feels clean | Skip heavy conditioning; use only a light protectant if needed |
| Stitched or perforated trim | pH-neutral cleaner, applied sparingly | Soft detailing brush and microfiber | Brush seams gently, then blot dry | Protect lightly and keep product out of holes |
| Matte, satin, or gloss finish control | pH-neutral leather cleaner with no shine additives | Microfiber cloth | Buff until the finish stays even | Use matte-only conditioner or a UV protectant that does not darken or gloss |
How do you tell leather trim from leatherette?
Check the material before you condition anything. Finished automotive leather usually has a natural grain and may be marked as leather in the owner’s materials, while leatherette often feels more uniform and can look more plastic at close range. If you are unsure, treat it as synthetic until verified.
Confirm finish change on a hidden spot by applying the cleaner to a tucked edge, waiting about 10 to 15 minutes, and checking for color transfer, darkening, or a slicker look. If the finish shifts, stop and move to a milder product. Leatherette may need a different cleaner, and over-conditioning can leave it greasy.
Check the material before conditioning
- Look for labeled trim information in the owner’s manual or trim guide.
- Compare the texture on a seat bolster, door insert, and dash-top accent.
- Assume leatherette if the surface looks uniform and lacks the feel of finished leather.
Use a hidden spot to confirm finish change
- Choose a concealed area under the seat edge or near a lower panel seam.
- Apply one light pass of cleaner to the cloth, then wipe a 2 to 3 inch area.
- Wait about 10 to 15 minutes and check for gloss, darkening, or transfer to a dry cloth.
How do you clean leather trim without drying it out?
Clean with a pH-neutral leather cleaner, applied to the cloth rather than sprayed directly onto the surface when possible. Work one small section at a time, use short-pile microfiber, and keep the cloth damp, not soaking wet. Dry the surface fully after cleaning so residue does not stay in seams or perforations. On most interiors, the surface should be touch-dry in about 5 to 10 minutes and fully ready for protection after 15 to 30 minutes in normal cabin conditions.
Vacuum or dust first
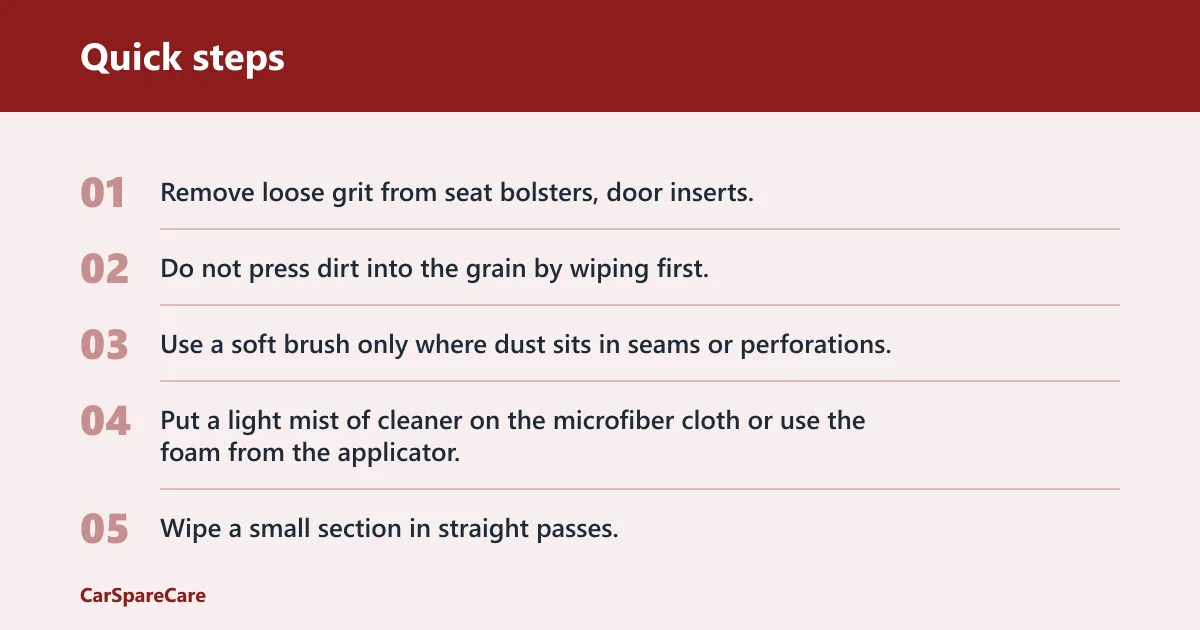
- Remove loose grit from seat bolsters, door inserts, and stitching with a vacuum or dry microfiber.
- Do not press dirt into the grain by wiping first.
- Use a soft brush only where dust sits in seams or perforations.
Apply cleaner to the cloth, not the surface
- Put a light mist of cleaner on the microfiber cloth or use the foam from the applicator.
- Wipe a small section in straight passes.
- Flip the cloth often so you are lifting soil instead of spreading it.
Brush stitching and seams lightly
- Use a soft detailing brush with light pressure on grain lines, seams, and perforations.
- Lift embedded grime with short strokes, not scrubbing.
- Follow with a dry microfiber to remove loosened residue.
Wipe fully dry and leave ventilation time
- Buff each section with a clean, dry microfiber until no damp feel remains.
- Open the doors or run cabin ventilation so trapped moisture can leave the cabin.
- Check seams and perforations again before closing up.
Regular cleaning can reduce wear and discoloration, and they warn not to soak cloth because foam can stay wet for days. That matters on leather trim because edge buildup shows quickly and can make the surface feel sticky.
How to clean car interior leather depends on where the leather sits and how it is finished. Finished leather on seats, door trim, and dash accents often responds well to a pH-neutral leather cleaner, but leatherette should be treated more cautiously and without heavy conditioning.
How do you protect leather trim after cleaning?
Use a leather conditioner or protectant only after the surface is clean and fully dry. Choose a product that leaves no greasy feel and keeps the finish matte or satin, not shiny. On sun-exposed trim, UV protection matters for dash-top accents, upper door trim, and steering-wheel sections that fade faster. Reapply every 2 to 4 months on high-exposure trim, and every 4 to 6 months on low-touch areas.
Choose a conditioner or protectant that leaves no greasy feel
- Apply a thin coat to a microfiber applicator, not directly to the trim.
- Work it into the surface with even pressure.
- Buff off any excess before it settles in the grain.
Use UV protection on sun-exposed surfaces
- Focus on top surfaces that sit under direct sunlight.
- Use a product that lists UV protection where available.
- Recheck after drying for shine, tackiness, or residue lines.
Match reapply timing to use and exposure
- Reapply sooner on upper dash trim, steering-wheel leather sections, and driver-side bolsters.
- Reapply later on lower door trim and rear seats that see less sun and touch.
- Adjust by feel: if the trim starts looking dry or grabs dust, it is time to refresh it.
Buff away residue in seams and edges
- Wrap a dry microfiber around a fingertip or plastic detail tool covered with cloth.
- Wipe seam edges, piping, and stitched lines after conditioning.
- Keep product out of perforations so dust does not cling there later.
Popular Mechanics says leather spray may not save badly worn seats. That is useful here: if trim already feels dry or cracked, protection can slow further wear, but it will not reverse damage. A common first-timer mistake is adding more conditioner when the trim still looks dull, which usually creates a slick finish instead of a healthier one. Product labels matter too: some trim-safe options, such as 303 Aerospace Protectant for UV exposure or a matte leather conditioner for finished leather, are better suited to protection than all-in-one shine products.
What should you use on leather seats versus leather door trim?
Use the same cleaner family, but lighter on trim than on seats. Seats can handle more product loading because they are broader surfaces, while door inserts, steering-wheel leather sections, and dash-top accents need careful edge control so residue does not collect along stitching, switches, or panel joints.
For seats, work one larger panel at a time. For trim, keep the applicator drier and wipe back sooner. That matters on matte interiors, where a glossy spot from excess conditioner is easy to see in daylight.
Use separate applicators when possible: one for cleaner, one for protectant. A foam cleaner such as Chemical Guys Leather Cleaner or a straightforward pH-neutral spray is easier to control on trim than a rich balm, and it lowers the risk of streaking around door pulls and stitched seams.
Leather seat care often tolerates a little more product than trim, but the goal stays the same: keep the surface clean, dry, and non-greasy. Trim usually needs less conditioner, less dwell time, and more buffing than seat upholstery.
Common mistakes
These are the main ways leather trim goes wrong, and the fix for each one is simple.
- Using too much liquid: Spray the cloth, not the panel, and keep the microfiber damp only.
- Leaving residue in perforations: Brush gently, then blot and dry the holes with a clean cloth corner.
- Making matte leather look glossy: Use a finish-safe product with no added gloss and buff off all excess.
- Skipping the test spot: Check a hidden area for 10 to 15 minutes before treating visible trim.
- Conditioning leatherette like real leather: Verify the material first; synthetic trim may need a different cleaner and less product.
Say your driver-side door insert has sunscreen transfer around the armrest and the upper seam. A pH-neutral cleaner on a short-pile microfiber cloth, plus one light pass with a soft brush in the seam, is usually the safer path than adding more conditioner right away.
If the steering-wheel leather section feels sticky after a previous product, clean it with a fresh microfiber cloth and a light application of cleaner, then dry it fully before deciding whether it needs any protectant at all. More product often makes the tacky feel worse.
Frequently asked questions
How do I clean car interior leather without drying it out?
Use a pH-neutral leather cleaner, apply it to a microfiber cloth, and work in small sections so the surface never stays wet. Dry it fully, then add a light protectant only if the trim looks dry or sees strong sun. Avoid soaking seams and perforations.
What is the best product to clean leather car interior?
A common starting point is a pH-neutral leather cleaner in spray or foam form with no added gloss. Choose a product that wipes clean without residue and pair it with separate microfiber cloths for cleaning and buffing. On sun-exposed trim, add UV protection after cleaning.
Do I need to condition leather trim after cleaning?
Not always. Condition trim when it feels dry, gets heavy sun, or needs more suppleness, but skip heavy conditioning on matte or synthetic-looking surfaces. A light protectant is often better than a rich conditioner on door trim, dash accents, and steering-wheel leather sections.
Can I use household soap on car leather trim?
It is safer to avoid household soap on finished automotive leather trim. Use a pH-neutral leather cleaner instead, because household soap can leave residue and change the feel of the surface. If grime is stubborn, repeat gentle cleaning before moving to a stronger leather-safe product.
How often should I clean and protect leather interior trim?
Clean when dust, oils, or sunscreen transfer appears, and protect after cleaning based on sun exposure and touch frequency. High-touch areas often need attention more often than lower door panels. If the trim starts looking dry, fading, or dusty again, shorten the interval.
How do I protect leather interior from cracking?
Keep the surface clean, avoid over-wetting, and use a non-greasy conditioner or UV protectant on sun-exposed areas. Drying and UV exposure are the main reasons leather trim ages early. Regular cleaning helps, but protection matters most on dash-top accents, upper doors, and steering-wheel leather sections.
How do I remove grime from perforated leather trim?
Use a soft detailing brush with a pH-neutral cleaner, then blot the holes with a dry microfiber corner instead of flooding them. The goal is to lift grime out of the perforations, not push it deeper. If residue remains, repeat with less product and more drying time.
How do I avoid a shiny finish on leather trim?
Choose a matte or satin product with no gloss additives, apply it in a thin layer, and buff off every trace after 5 to 10 minutes. Gloss usually comes from excess product, not the leather itself. If a panel turns shiny, clean it back with a damp microfiber and start lighter.

Hi, I’m Melvin, an automobile engineer with extensive experience in automobile equipment. I currently work for a local automobile firm, where I specialize in the car parts industry. I’ve had the opportunity to collaborate with seasoned inspectors, gaining invaluable hands-on experience that goes beyond just theory.
My passion for automotive care started at a young age, which led me to create CarSpareCare. Through CarSpareCare, I share the knowledge and skills I’ve acquired over the years to help others navigate the world of car maintenance and repairs.
My goal is to provide practical tutorials, essential safety advice, and the latest industry insights so that anyone—whether a beginner or an expert—can confidently tackle their automotive projects.