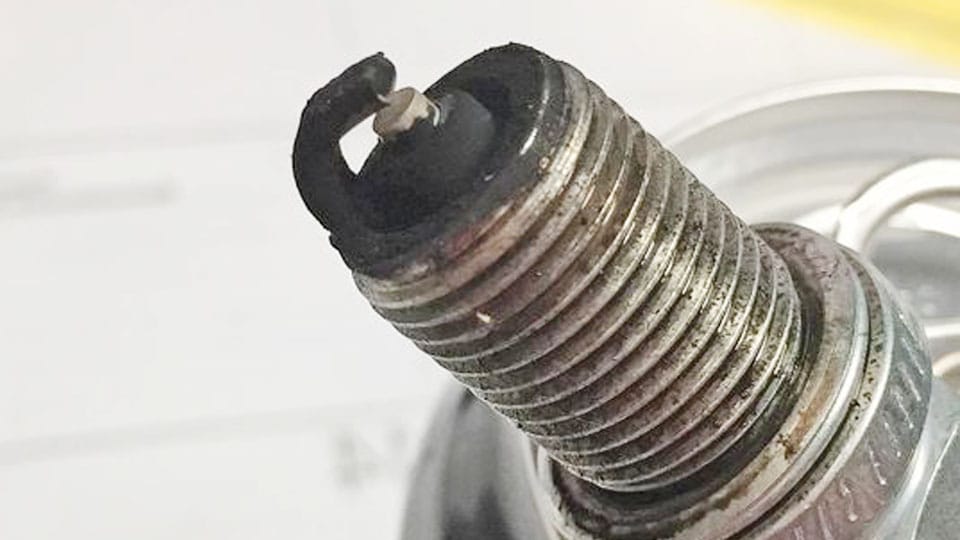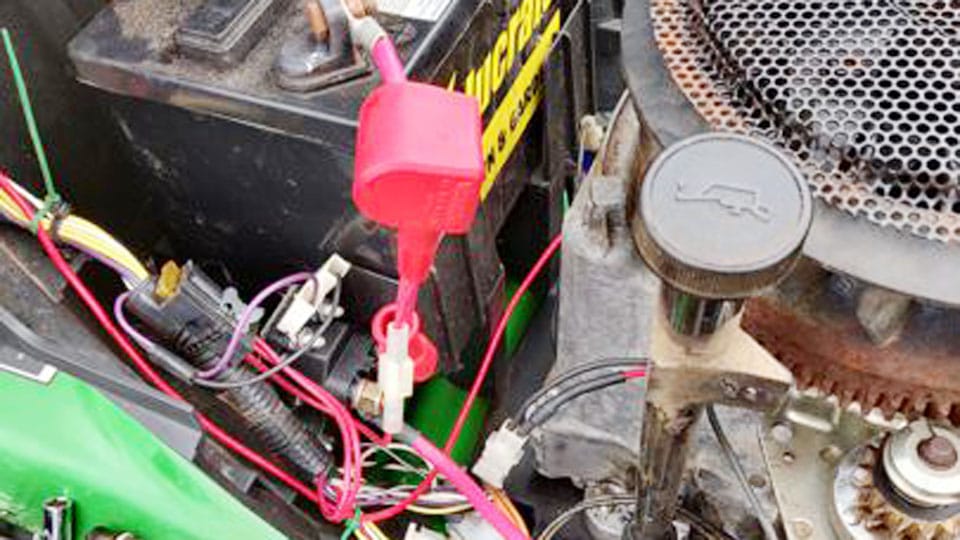
Check the spark plug first on any small gas engine that hard-starts, stalls, misfires, or loses power. Clean, gap, or replace it if the insulator is fouled, the electrode is worn, or the gap is outside the spec on the engine label. Ignoring it can waste fuel, foul carburetor parts, and hide ignition or fuel problems that need a different fix. This guide covers how to inspect, test, service, gap, and replace spark plugs on mowers, chainsaws, snowblowers, trimmers, and leaf blowers.
What you’ll need
- Gap tool
- Spark plug socket and ratchet
- Torque wrench
- Replacement plug and owner manual
- Shop rag and flashlight
How to use the diagnostic workflow
Start with the engine model number, then compare the plug’s part number, gap, and heat range with the owner manual. That order matters because plug fit is not universal across a mixed fleet of lawn equipment, and a correct-looking plug can still be wrong for the engine.
Use this as a diagnostic flow, not a parts swap. A clean plug with the wrong gap can still cause hard starting, while a fouled plug may point to stale fuel, oil entry, or ignition trouble beyond the plug itself.
OEM service documentation is the authority for the exact plug family, gap, torque, and replacement interval. Briggs & Stratton service literature commonly calls for replacing the spark plug at regular service intervals, and Honda small-engine manuals likewise list the plug spec and service interval in the maintenance schedule. NGK and Champion technical references are useful for cross-reference and heat-range matching, but the engine manual decides the final fit.
- Read the model number on the engine shroud or valve cover and match it to the manual.
- Pull the plug wire straight off and remove the plug with a socket.
- Inspect the nose, electrodes, and threads under a flashlight.
- Measure the gap with a gap tool and compare it with the engine label.
- Decide whether to clean, regap, or replace based on the condition you see.
- Install the correct plug with the stated torque, then test-start the engine.
Is the spark plug the problem?
A spark plug is often a first check when the engine cranks but will not start, starts after repeated pulls, runs rough under load, or loses power after storage. The usual service-doc workflow from Briggs & Stratton and Honda starts with the plug because it is quick to inspect and because gap, wear, and fouling are common causes of hard starting and rough running.
If the engine still has old fuel, a clogged carburetor, a weak ignition coil, or low compression, a new plug may not change the symptom for long. That is why the plug check comes first, but not last.
Hard starting after storage
Storage failures often show up as one or two extra pulls, then a cough and stall. Inspect the plug for carbon fouling, wet fuel, or oil deposits. Stale fuel and humidity can make the plug look guilty even when the real issue is varnish in the carburetor or degraded fuel in the tank. On walk-behind mowers, this most often appears as dry black carbon on the nose and ringed deposits around the ground strap; on trimmers and handheld equipment, wet fuel and gummy deposits are more common after long storage because the carburetor bowl and fuel lines are smaller and dry out faster.
Misfire, rough running, or loss of power
When the engine starts but stumbles at throttle, read the plug before you change anything else. Dry black soot points toward carbon fouling, while an oily nose points toward oil entry or storage issues. A plug that looks serviceable can still misfire if the gap has opened up from electrode wear. Honda and Briggs maintenance guidance both treat the plug as a periodic wear item, not a permanent part.
When to suspect fuel or ignition instead
If the plug is clean, the gap is correct, and the engine still will not fire consistently, move to fuel delivery and ignition. Check for fuel flow, a dirty carburetor, and spark at the lead. A healthy-looking plug does not rule out a blocked main jet or a failing coil. One common misdiagnosis is replacing the plug repeatedly when the real fault is an intermittent coil that only breaks down under heat; another is blaming the plug for a no-start caused by stale fuel varnish in the carburetor throat.
How do you inspect a small engine spark plug?
Remove the plug safely, then inspect the electrodes, insulator, and threads for the clues that separate plug trouble from engine trouble. Inspection is the fastest way to tell whether cleaning is still reasonable or whether the plug has reached the end of service life.
The ceramic insulator should be intact, with its ribs uncracked. A cracked or damaged insulator can promote flash-over, which can let spark leak where it should not. NGK and Champion both note that insulator condition matters for spark integrity and that heat range and construction affect how the plug handles deposits and temperature.
- Shut the engine off and remove the ignition lead.
- Wipe dirt from around the plug so debris does not fall into the cylinder.
- Remove the plug and keep track of the sealing washer if present.
- Check the nose for dry carbon, wet oil, fuel, glazing, or cracks.
- Look at the ground electrode and center electrode for rounding, erosion, or burn marks.
- Inspect the threads for damage or galling before you decide to reuse the part.
Suppose a 21-inch walk-behind mower starts only after the third pull and the plug nose is dry black. That points to carbon fouling, which often means the plug is not sparking cleanly or the engine is running too rich.
Say a string trimmer shows a wet, oily plug after winter storage. That may be more than a plug problem, because oil fouling can point to mixture, storage, or internal engine conditions that need a wider check. On handheld two-stroke equipment, oily deposits on the insulator and bridge-like carbon between the electrodes are common; on four-stroke mowers, dry soot and ash deposits are more typical.
What gap, heat range, and torque should you use?
Use the manufacturer’s specified gap, not a guess. Measure it with a gap tool before installation, because a wrong gap can make cold starts harder and can weaken combustion. Honda and Briggs service docs list the gap directly in the engine-specific maintenance section; NGK and Champion cross-reference charts help verify the proper plug family and heat range, but they do not override the OEM spec.
Heat range is engine-specific. A plug that runs too hot can promote pre-ignition or tip damage; a plug that runs too cold can stay dirty and foul more easily. The OEM recommendation is the safest starting point.
| Item | What to check | Why it matters | Action |
|---|---|---|---|
| Spark plug gap | Match the engine label or manual with a gap tool | Incorrect gap can raise misfire risk | Set to the manufacturer-specified gap |
| Heat range | Use the engine’s specified plug family | Too hot or too cold changes combustion temperature | Buy the OEM replacement plug or exact equivalent |
| Torque | Use the listed installation torque | Overtightening can damage cylinder head threads | Tighten with a torque wrench, not by feel |
| Common engine family | OEM spark plug number | Gap spec | Torque spec |
|---|---|---|---|
| Briggs & Stratton 500E / 550E / 625E / 675E family | Champion RJ19LM or Briggs & Stratton OEM equivalent listed for the model | 0.030 in (0.76 mm) | 180 in-lb (15 ft-lb / 20 N·m) |
| Briggs & Stratton Intek walk-behind mower engines | Champion RJ19LM or Briggs & Stratton OEM equivalent listed for the model | 0.030 in (0.76 mm) | 180 in-lb (15 ft-lb / 20 N·m) |
| Honda GCV160 / GCV190 / GCV200 family | NGK BPR6ES | 0.028–0.031 in (0.7–0.8 mm) | 156 in-lb (13 ft-lb / 17 N·m) |
Torque matters because many small-engine heads use soft aluminum threads. A plug shell with precision rolled threads helps thread durability during installation, but it does not replace the need to use the correct torque spec. A plug that is too loose can leak compression; one that is too tight can strip the head or distort the washer seal.
When should you clean, regap, or replace it?
Clean a plug only when the electrodes are sound, the insulator is intact, and fouling is light. A plug with heavy carbon, oil, a cracked ceramic body, or worn electrodes should be replaced instead. OEM maintenance schedules generally treat spark plugs as replaceable wear parts, with inspection and replacement intervals based on hours of use or seasonal service.
As a seasonal rule, inspect before the first spring use, again after heavy summer work, and before winter storage. If the engine sees a lot of use, follow the hours in the manual rather than a generic interval. Briggs & Stratton and Honda both publish service intervals in their maintenance schedules, and those intervals take priority over guesswork.
- Clean light carbon with a non-abrasive method approved by the plug maker.
- Recheck the gap after cleaning, because cleaning can change the electrode spacing.
- Replace the plug if the center or ground electrode is rounded or burned away.
- Replace it if the insulator is cracked, glazed, or oil-soaked.
- Install the new plug to the stated torque and retest the engine.
Do not wire-brush aggressively or sand the electrodes. That can damage the plating and leave grit behind. If the plug has oil fouling, address the engine cause as well, because oil deposits often return after a simple replacement. In practice, a plug that cleans up and then quickly fouls again usually points to a carburetor issue, a restricted air filter, a bad fuel mix on two-strokes, or an ignition problem that is not producing a hot enough spark under compression.
Spark plug decision table
This table turns the inspection into a quick decision. Use the equipment type, symptom, plug condition, and next action together, because the same bad-looking plug can mean different things on a mower, trimmer, or snowblower.
| Equipment | Symptom | Likely plug condition | Inspection clue | Next action |
|---|---|---|---|---|
| Walk-behind mower | Hard starting after winter storage | Carbon fouling or wet fuel | Dry black nose, sooty electrodes | Clean if light; otherwise replace and check stale fuel |
| Riding mower | Rough running under load | Worn electrode or wrong gap | Rounded center electrode, gap out of spec | Replace plug, then verify fuel delivery and air filter |
| String trimmer | Starts, then dies at throttle | Oil fouling or weak spark | Wet oily deposits on insulator | Replace plug and inspect mixture, storage, and compression |
| Chainsaw | Hard pull-starting, then misfire | Fouled or heat-range mismatch | Glazed nose, carbon on threads | Confirm OEM plug family and fuel mix, then replace |
| Snowblower | No-start in cold weather | Gap too wide or plug too cold | Intermittent spark, dark deposits | Measure gap, verify heat range, replace if worn |
| Leaf blower | Rough idle after storage | Carbon fouling | Dry soot on tip and insulator ribs | Clean only if light; otherwise install OEM replacement |
| Condition severity | What you see | Clean or replace? | Most likely next diagnostic step |
|---|---|---|---|
| Minor | Light tan deposits, no cracks, electrodes still square | Clean and regap | Retest starting and idle; if symptom stays, check fuel freshness |
| Moderate | Dry black soot, widened gap, slight electrode rounding | Replace if fouling returns or gap is unstable | Inspect air filter, carburetor, and choke operation |
| Severe | Wet oil, cracked insulator, burned electrode, or heavy glazing | Replace immediately | Check compression, oil entry, mixture, and ignition output |
| Repeat failure | New plug fouls again after a short run | Replace only after correcting root cause | Look for carburetor flooding, fuel restriction, or weak coil |
How do you choose the right replacement?
Use the engine model number first, then look up the OEM replacement plug or an exact cross-reference listed for that engine. The safest answer is the engine maker’s part number, because the correct plug family depends on thread size, reach, heat range, terminal style, and projected vs. non-projected tip design.
Compatibility is the main issue, not brand loyalty. NGK and Champion cross-reference charts can identify equivalent plugs, but the final answer should still match the engine manual. For mixed fleets, keep a simple model-number log so each machine gets the right part number.
- Read the full engine model, type, and code from the shroud or tag.
- Check the manual or parts list for the exact plug part number.
- Match the thread size, reach, and heat range before buying.
- Choose the OEM replacement plug when the engine maker lists one.
- Consider an engine maintenance kit if the season service also calls for air filter, oil, oil filter, spark plug(s), or fuel filter.
Maintenance-kit guidance from OEM parts programs can be useful when the plug is part of a larger seasonal service, but the plug spec still has to match the engine. A kit is convenient when you are already doing the air filter, oil, and fuel filter at the same time.
Frequently asked questions
How often should I replace spark plugs on a lawn mower?
Follow the engine manual first. As a practical service check, inspect the plug before the mowing season and again if starting gets harder, idle quality drops, or the engine has been stored with fuel in it. Replace sooner if the electrode is worn, the insulator is cracked, or fouling returns after cleaning. Many Briggs & Stratton and Honda small-engine schedules call for inspection and replacement at regular service intervals, often based on operating hours.
How do I check if a small engine spark plug is fouled?
Remove it and look for dry black soot, wet oil, heavy carbon, or a glazed nose. A fouled plug often has deposits on the insulator and electrode area that weaken spark quality. Use a flashlight and compare both electrodes, not just the tip, because the threads can also show residue.
What spark plug gap should a lawn mower use?
Use the gap listed on the engine label or in the owner manual. Measure it with a gap tool before installation, and set it exactly to spec. A gap that is too wide can make starting harder, while one that is too tight can weaken combustion and reduce spark reliability. For many Briggs & Stratton walk-behind mower engines, 0.030 in is common; many Honda GCV engines call for 0.028–0.031 in.
Can I clean a small engine spark plug instead of replacing it?
Yes, but only when the plug has light carbon and no cracks, heavy wear, or oil soaking. Clean gently, then recheck the gap. If the center electrode is rounded, the ground electrode is burned, or the insulator is damaged, replacement is the better choice.
Why does my mower start hard even with a new spark plug?
A new plug does not rule out stale fuel, a dirty carburetor, bad fuel flow, or a weak ignition coil. Check whether the new plug matches the engine model and heat range, then move to fuel and ignition testing if the starting problem stays the same after installation. A plug that failed immediately after replacement is often a symptom, not the cause.
Should I torque a lawn mower spark plug by hand or with a wrench?
Use a torque wrench when the manufacturer gives a torque spec. Hand-tight plus a turn count is only a rough fallback when no spec is available, and it can overdo the clamping force. Overtightening risks cylinder head thread damage, especially in small aluminum heads.
What spark plug fits my Briggs & Stratton or Honda mower engine?
Use the engine model number and the parts listing for that exact engine, not only the mower brand. Briggs & Stratton and Honda both use multiple plug families across their engines, so the correct fit depends on thread size, reach, heat range, and terminal type listed for that model. For the most common walk-behind mower engines, NGK BPR6ES and Champion RJ19LM are frequent OEM-listed references, but the final answer should come from the engine model’s parts list.

Hi, I’m Melvin, an automobile engineer with extensive experience in automobile equipment. I currently work for a local automobile firm, where I specialize in the car parts industry. I’ve had the opportunity to collaborate with seasoned inspectors, gaining invaluable hands-on experience that goes beyond just theory.
My passion for automotive care started at a young age, which led me to create CarSpareCare. Through CarSpareCare, I share the knowledge and skills I’ve acquired over the years to help others navigate the world of car maintenance and repairs.
My goal is to provide practical tutorials, essential safety advice, and the latest industry insights so that anyone—whether a beginner or an expert—can confidently tackle their automotive projects.