
Touch up chips smaller than a pencil eraser with OEM-matched paint, but if metal is exposed, the chip is at an edge, or it is larger than about 5 mm, stop and consider a body shop. The wrong prep or extra paint leaves a raised, mismatched spot that still rusts and can be harder to fix later. This article explains how to match paint, prep the chip, apply color and clear coat, and decide when DIY is enough.
Why chip size changes the fix

Chip size, location, and paint type decide whether you can repair the spot cleanly or only make it more obvious. Very small chips usually need a paint pen. Larger divots, edge damage, and rusted bare metal need more prep, more layering, and a lower threshold for stopping the job.
Tiny chips, medium chips, and repair limits
Very small chips are best handled with a paint pen, and wikiHow says chips smaller than a pencil eraser are DIY-friendly. Once the chip is big enough that the repair needs repeated filling and leveling, a brush applicator or spray system is usually a better fit. If the chip exposes metal, corrosion risk rises immediately.
A common mistake is using the same touch-up approach on a tiny rock chip and a deep gouge, even though each needs different prep and paint layering. A 2 mm rock ding on a hood often needs only a precise fill and clear coat. A 6 mm chip on a door edge can turn into a visible ridge if you overfill it.
Solid, metallic, and pearl paint systems
Solid paint is the easiest to blend. Metallic and pearl finishes are less forgiving because the flake or pearl effect changes with coat thickness and spray pattern, so brush marks and heavy spots stand out sooner. For metallic or pearl, use the lightest practical application and stop sooner if the repair is on a visible vertical panel.
What you’ll need
- OEM-matched touch-up paint in the correct base color
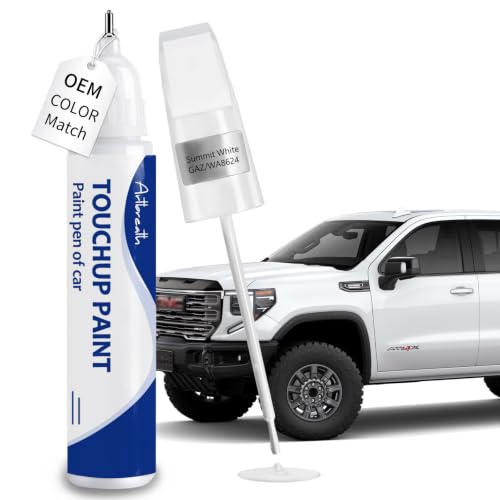
- Touch-up paint pen for tiny chips
- Brush-in bottle for medium chips and divots
- Aerosol or ready-to-spray can for larger, blended repairs
- Primer for bare metal
- Clear coat
- Wax and grease remover
- Car wash soap, clean water, and microfiber cloths
- Fine wet/dry sandpaper for prep and leveling; Popular Mechanics used 1000-grit wet/dry sandpaper, and wikiHow advises 220-grit for prep on larger repair work, but do not use coarse paper on the face of a tiny chip (Wikihow)
- Masking tape and a clean applicator or toothpick for controlled fill
- Polishing compound for final blending after cure, if needed
Paint chip decision table
| Chip diameter | Bare metal visible? | Panel position | Recommended tool | Prep level | Drying intervals | Stop point |
|---|---|---|---|---|---|---|
| Up to about 3 mm | No | Horizontal or vertical, but away from edges | Paint pen | Wash, dry, wax and grease remover | Allow the base to dry until tack-free; wait 30 to 60 minutes before clear coat if the product calls for layering | Stop if the chip is on a seam, edge, or textured bumper corner |
| About 3 to 5 mm | No | Horizontal preferred | Brush applicator | Wash, dry, remover, very light sanding only if the edge is ragged | Apply several thin coats with 20 to 30 minutes between coats, or per the product label | Stop if patchiness remains after the second leveling pass |
| About 3 to 5 mm | Yes | Horizontal panel | Brush or small aerosol repair | Wash, dry, remover, rust removal, primer | Let primer cure fully before color; then allow color to dry before clear coat | Stop if rust has spread under surrounding paint |
| Over about 5 mm | Yes or unknown | Edge, seam, rocker panel, or bumper corner | Do not DIY | Body shop prep required | Varies by repair system | Send out if the chip reaches a body seam, fold, or corrosion blister |
How do you choose the right repair method?
Choose the tool by size first, then by location and paint type. A pen is best for very small chips and rock dings, a brush applicator is better for medium chips, and spray repair fits larger areas or more visible blends. Bare metal means primer is required before color.
Measure the chip first. If it is smaller than a pencil eraser, start with a pen. If it is larger, move to a brush or spray repair so you can fill the divot without piling paint into a mound.
Check the panel location. Horizontal panels usually hide repair lines better than vertical ones. Edges, seams, rocker panels, and bumper corners are harder to blend, so the DIY threshold should be lower there.
Match the paint system. Solid colors are the simplest. Metallic and pearl finishes need the cleanest blend possible, so keep the repair small and avoid heavy wet coats that change the flake pattern.
Confirm the paint code. Look for the OEM color code on the door jamb or driver door sticker, then use the VIN only as a backup for manufacturer or dealer confirmation. AutomotiveTouchup notes that the OEM color code is needed to match existing paint.
Say your hood has a 2 mm chip with no exposed metal. A paint pen and clear coat are usually enough. If the same chip is on a door edge and the primer shows through, the repair is more likely to need a body shop because the edge will wear and chip again.
How do you prepare the chip for paint?
Wash the area with soap and water, dry it fully, then remove wax and oil before any paint touches the chip. Popular Mechanics advised washing the car before repair work and removing wax, grease, and silicone before painting. wikiHow also says to remove wax and grease before adhesion, which helps the touch-up bond instead of fisheye or peel.
Wash the panel fully. Remove road film, dust, and loose grit, then dry the area completely. Any residue left in the chip can keep the repair from bonding cleanly.
Clean with remover. Use wax and grease remover on the damaged spot and the surrounding paint, then let it flash off. This step removes silicone and polish residue that can cause fisheyes.
Trim loose edges carefully. If paint is flaking, use very fine wet sanding only around the loose edge, not across the whole chip face. Popular Mechanics used 1000-grit wet/dry sandpaper, which is fine enough for miniature leveling without gouging the finish.
Clean again before coating. Wipe the area after sanding, then let it dry completely. A clean, dry chip holds primer and color more evenly.
How do you apply primer, paint, and clear coat?
Use primer only when bare metal is visible, and let it cure fully before color coats. Then build color in thin layers, let it dry between coats, and finish with clear coat after the color has set. Thin layers reduce shrinking and raised blobs, especially on vertical panels.
Prime bare metal first. Apply primer only to exposed metal and feather the edge just enough to cover the spot. Primer improves adhesion and helps protect against corrosion, but it must fully cure before paint goes on.
Build color in thin coats. Apply several light coats instead of one heavy fill. TouchUpPro recommends applying thin layers gradually and drying fully between coats, which helps avoid a lumpy repair that shrinks later.
Top up in small increments. Add about one light pass or one drop at a time to a tiny chip, then recheck the surface after each dry interval. Stop once the fill is level or just slightly proud of the surface, because overfilling creates a visible blob.
Let the color set. Wait until the base coat is dry to the touch before clear coat. If the product calls for a specific window, follow it; a common touch-up sequence uses 20 to 30 minutes between light coats, but product labels vary.
Apply clear coat last. Clear coat adds protection and gloss after the color has dried. If the repair is still high after curing, lightly level it and polish carefully, because aggressive sanding can leave visible marks.
Suppose a door has a 4 mm chip with exposed primer but no rust. The usual path is remover, light cleanup, color in thin coats, then clear coat. If the same chip is on a rocker panel and keeps catching road grit, the finish may not last long enough to justify a DIY repair.
Common mistakes to avoid
Most visible failures come from too much paint, poor cleaning, or rushing the dry time. Fisheyes point to wax or silicone left behind. Patchiness usually means the coat was too thin or the color was not allowed to level. Shrinking happens when the fill is too heavy or the layers were not cured fully. Raised blobs mean the chip was overfilled.
- Fisheyes: Clean again with wax and grease remover before repainting.
- Patchiness: Add another thin coat, not one heavy coat.
- Shrinking: Wait longer between coats and before clear coat.
- Raised blobs: Stop filling slightly proud, then level after cure if needed.
- Visible sanding marks: Use the least aggressive grit that will level the spot, then polish after full cure.
When should you stop and use a body shop?
Stop DIY work when the chip reaches an edge, seam, rocker panel, or bumper corner, or when rust has spread beyond the original spot. Chips larger than about 5 mm are also a poor DIY bet if the repair must disappear on a highly visible panel. The more the damage interrupts a body line, the less likely a touch-up will blend cleanly.
Check for rust spread. If corrosion has lifted surrounding paint, the damage is already beyond a simple fill. Repairing over rust only hides the problem for a short time.
Inspect the edge geometry. Chips on folds, seams, and sharp body edges lose paint faster than flat panels. Those spots often need sanding, feathering, and refinishing that is more than a touch-up.
Compare cost and risk. A pen is the cheapest and fastest option for tiny chips. Brush and spray repairs take more time and materials, and a body shop becomes the better value once the chip is large, rusted, or on a difficult edge.
Frequently asked questions
How do you find the right paint code for your car?
Check the door jamb or driver door sticker first, because that is where many manufacturers place the code. If the label is missing or unreadable, use the VIN with a dealer or manufacturer lookup to confirm the exact OEM color code before ordering paint.
How long should touch-up paint dry before waxing?
Wait at least about 72 hours before washing or waxing unless the product label calls for a longer cure time. If the surface still feels soft, the clear coat has not finished curing and wax can trap solvent or dull the repair.
What tools do I need to touch up car paint?
At minimum, you need the correct touch-up paint, wax and grease remover, clean towels, and a way to apply paint precisely. Add primer for bare metal, clear coat for protection, and fine wet/dry sandpaper for cleanup or leveling after cure.

Hi, I’m Melvin, an automobile engineer with extensive experience in automobile equipment. I currently work for a local automobile firm, where I specialize in the car parts industry. I’ve had the opportunity to collaborate with seasoned inspectors, gaining invaluable hands-on experience that goes beyond just theory.
My passion for automotive care started at a young age, which led me to create CarSpareCare. Through CarSpareCare, I share the knowledge and skills I’ve acquired over the years to help others navigate the world of car maintenance and repairs.
My goal is to provide practical tutorials, essential safety advice, and the latest industry insights so that anyone—whether a beginner or an expert—can confidently tackle their automotive projects.

