
Wash the scrape as soon as practical, ideally within about 24 hours, check whether the clear coat or primer is exposed, and apply touch-up paint or a protective film only after the panel is clean and dry. Left alone, scrapes trap grit, start corrosion on exposed metal, and turn a small scuff into a costly repaint. This guide shows how to identify the damage, choose between DIY repair and body-shop work, and keep doors, bumpers, and fenders from getting hit again in parking lots.
What a parking lot scrape usually hits
Most parking-lot damage starts as a transfer mark, a clear-coat scratch, or a deeper gouge that reaches colour layers below the surface. Automotive paint usually has three layers: clear coat, base coat, and primer. Knowing which layer is marked tells you whether polishing, touch-up paint, or professional refinishing makes sense.
Clear coat, base coat, and primer: what each layer means
The clear coat is the top layer. Light scratches may stay in that layer only, and those are the ones most likely to respond to polishing or scratch remover after a proper wash. If the mark goes into the base coat, the colour layer is damaged. If you can see primer, the repair usually moves beyond simple home correction.
Auto Express says light damage may be repairable if it only affects the clear coat or base layer. That matters because the repair path changes fast once the colour layer is breached. A light surface mark can often be corrected. A scrape that exposes primer usually needs paint work, not just abrasion and wax.
Signs of transfer paint versus real paint loss
Transfer paint sits on top of your finish. It often comes from another bumper, post, or door edge and can look like a coloured smear. Real paint loss looks dull, uneven, or white if primer is showing. If the mark wipes lighter but the panel underneath still looks intact, you may be dealing with transfer rather than actual paint removal.
A fingernail test helps here. The same source recommends using a fingernail test to judge scratch depth, and says a scratch you cannot feel with your nail may be removable with scratch removers or T-Cut. If your nail catches hard, the damage is deeper than a surface scuff.
Why door edges, bumpers, and mirror caps get hit first
These parts stick out and meet other cars, shopping carts, and concrete posts first. Door edges get clipped when a neighbour opens a door too wide. Bumper corners meet posts and low walls. Mirror caps sit right in the path of tight-lane scrapes, especially in narrow bays and angled parking spaces.
Say your rear bumper has a 3 cm white streak after a tight reverse into a post. If the streak is mostly on top of the paint and does not catch a nail, it is more likely a transfer mark. If the plastic is gouged and the colour has gone dull, the scrape has gone deeper.
What should you do in the first 10 minutes?
Start by clearing loose dirt, washing the area with car shampoo, and drying it with a clean microfibre cloth before touching the mark again. Do not rub grit into the finish. That first contact can turn a light scrape into a wider swirl pattern, especially on dark paint and soft clear coat.
Wash the area with car shampoo before any repair step
The same source says to wash the car thoroughly before using scratch remover, and that dedicated car shampoo plus drying with a clean, dry cloth gives the best results. Use a gentle wash on the damaged area first. You want road film, dust, and sand off the panel before any polish, cleaner, or touch-up work begins.
Dry with a clean microfibre cloth
A clean microfibre cloth helps remove water without dragging loose grit across the panel. Use a fresh side of the cloth if it picks up debris. If the cloth is dirty, it can scratch the clear coat while you are trying to protect it. Clean tools matter as much as the product.
Do not rub loose grit into the mark
Do not start by buffing the scrape dry. That can press dirt into the softest part of the finish. If the area still feels rough after washing, stop and inspect it under good light. If the roughness is on top of the paint, it may be contamination or transfer. If the surface has a groove, the paint may be cut through.
Parking lot scrape triage
Use this checklist to sort the damage before you choose a repair. The goal is simple: identify transfer, clear-coat damage, or paint-through damage, then stop at the safest next step. If the mark reaches primer or a sharp edge, do not keep correcting it at home.
| Damage type | What you are likely seeing | Safest next action | When to stop DIY |
|---|---|---|---|
| Transfer mark | Paint or rubber on top of your finish; colour underneath still looks intact | Wash, dry, then try gentle removal with a clean microfibre cloth before any abrasive step | Stop if the mark stays after washing and light cleaning, or if the area is textured plastic |
| Clear-coat scratch | Light line or haze that does not feel deep with a fingernail | Use a scratch remover on a clean, dry panel, then polish and wax if the surface clears | Stop if the scratch catches a nail, sits on a sharp edge, or spreads over a body line |
| Paint-through damage | Colour layer is missing, or primer shows through | Do not polish deeper. Protect the area and book a professional or SMART technician | Stop immediately if primer is visible, metal is exposed, or the scuff is large or on a tight edge |
Can a minor scrape be fixed at home?
Yes, but only if the damage stays shallow. A home repair makes sense for transfer marks and light clear-coat scratches that do not catch a fingernail. Once the scrape reaches the base coat or primer, touch-up paint or professional refinishing becomes more suitable than abrasive correction.

When scratch remover is the right choice
Scratch remover is a super-fine abrasive liquid or paste. The same source describes it that way, and says it works best on shallow clear-coat defects after washing. Use it only on a clean panel. Apply a small amount with a clean microfibre cloth, work lightly, and check the result before repeating.
It is best for the kind of mark that looks annoying in sunlight but does not show a groove. If the scratch disappears enough that the area looks even, finish with polish or wax where appropriate. If the line remains white, grey, or rough, the damage may be deeper.
When touch-up paint is the right choice
Touch-up paint suits deeper scrapes that reach the base coat or primer. It should match the vehicle paint code, which is often found in the driver’s door jamb or glove box. Apply it in thin layers. Thick blobs dry poorly and can leave a raised edge that attracts attention.
Touch-up paint is for filling, not for sanding away the problem. If the scrape has a clear cavity or a missing strip of colour, touching in the missing material is more sensible than trying to polish through a hole. A small chip on a bumper corner often needs this route more than a scratch remover.
How to tell a shallow mark from a deeper one
Use light, angle, and touch. A shallow mark usually sits in the clear coat and becomes less visible when the panel is wet. A deeper one has a definite edge, looks dull even after washing, or shows colour loss. If the mark is on a curve or edge, be more cautious because those spots lose paint faster.
A common first-timer mistake is trying a compound on a dirty bumper corner. The result is often a wider haze, not a better finish. Wash first, inspect second, and only then decide whether the scratch is a clear-coat problem or a paint-loss problem.
How do you know if it is too deep for DIY?
If the scratch catches a fingernail, shows primer, or sits on a complex edge, treat it as beyond simple polish correction. Small clear-coat marks are one thing. Bigger gouges, exposed primer, and scuffs on body lines are another. Those cases often need repainting or a SMART technician rather than more rubbing.
The fingernail test and what it can tell you
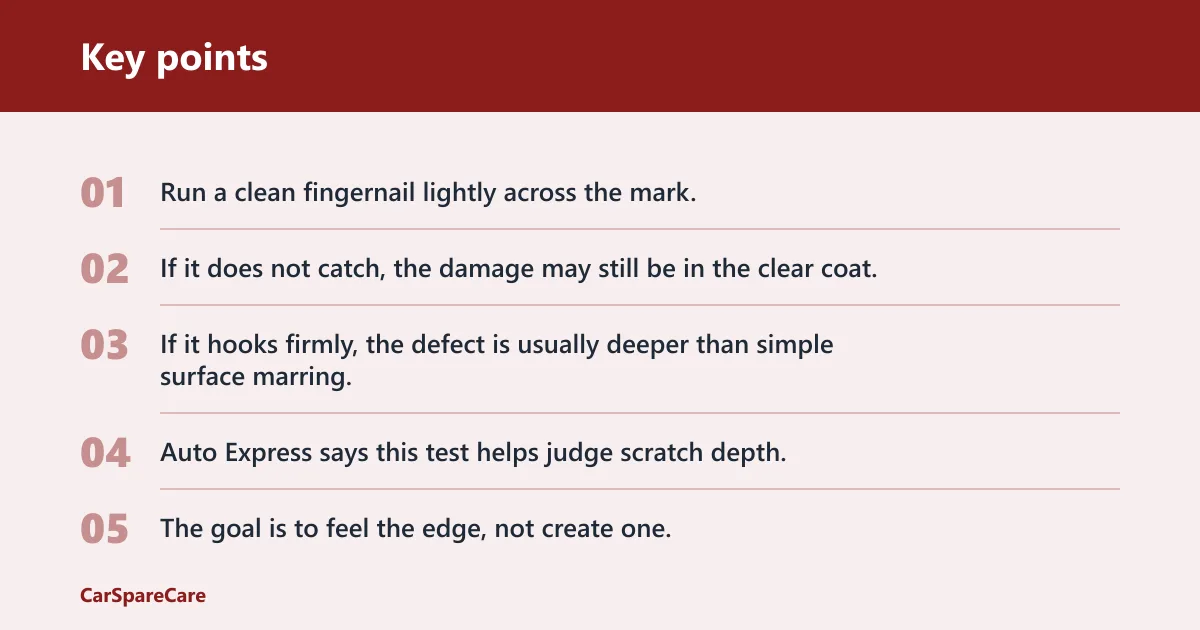
Run a clean fingernail lightly across the mark. If it does not catch, the damage may still be in the clear coat. If it hooks firmly, the defect is usually deeper than simple surface marring. The same source says this test helps judge scratch depth, and that a nail-free feel points toward scratch remover or T-Cut being possible.
Do not press hard. The goal is to feel the edge, not create one. Testing too aggressively can confuse the result and may add pressure marks to a soft panel.
Primer exposure and edge damage
Primer exposure usually means the scrape has gone through the colour layer. That pushes the repair toward touch-up paint or professional refinishing. Edge damage is harder still. Door edges, bumper corners, and mirror caps curve sharply, so the paint film is thinner there and more likely to break through.
Picture a door edge that has a 1 cm chip down to grey primer after a car park squeeze. A polish will not replace lost colour. That is a fill-and-refinish job, not a buffing job.
When a SMART technician is the better call
The same source says deeper scratches may need a qualified SMART technician, and that SMART technicians can blend paintwork back to looking like new. That is the better call when the damaged patch is larger, sits on a complex curve, or reaches primer. It is also the safer route when you do not want to risk making a visible repair line worse.
SMART repair works well for body panels where spot repair is possible without repainting the whole part. If the scrape spans a bumper corner and wraps around an edge, a technician can judge whether local refinishing will hold up better than an at-home touch-up.
What actually protects against future scrapes?
The best protection against parking-lot scrapes starts with parking habits, then moves to physical protection on vulnerable panels. Paint protection film offers the strongest barrier for light contact. Ceramic coating can help with easier cleaning and some resistance to minor marring, but it does not stop impact or scraping.
Paint protection film for vulnerable panels
Paint protection film, or PPF, is a transparent protective layer. It is a strong choice for bumper corners, door edges, and mirror caps because those are the places that take the first hit. PPF can absorb minor scuffs better than a coating alone, especially where another door or post is likely to make contact.
Ceramic coating for easier cleaning and less marring
Ceramic coating is a slick protective layer. It can resist some marring and makes dirt easier to remove. That matters because clean panels are less likely to hold grit that can scratch during washing. It is useful, but it is not a shield against a shopping cart, a post, or a door edge.
Why coating is not impact protection
Ceramic coating changes surface behaviour. It does not create a thick sacrificial barrier the way PPF does. If a bumper corner scrapes a concrete post, the coating can help the area stay cleaner afterward, but it will not stop the paint from being cut. For physical protection, film beats coating.
Think of it this way: coating helps keep the surface easier to clean. PPF helps keep the panel from taking the damage in the first place. That difference matters in tight parking bays.
How do you stop door dings and bumper scuffs?
Use wider spaces, park at the ends of rows when possible, and leave extra door clearance on the side where another car is most likely to park. Then protect the highest-risk panels first. Door edges, bumper corners, body lines, and mirror caps deserve attention before the flat middle of the door.
Safer parking habits for tight lots
Choose spaces with more clearance on one side, not the tightest gap near the entrance. End bays often reduce the number of neighbours to one side. If the lot has posts, avoid the ones that sit beside the door swing path or bumper corners. Parking a little farther away can reduce contact risk far more than a quick stop near the door.
Car Tire Reviews notes that parking lot posts can cause scrapes. That is why the closest space is often the riskiest, not the easiest.
Which panels deserve extra protection?
Start with the parts that stick out: bumper corners, mirror caps, and door edges. Body lines need care too because a sharp crease can lose paint faster than a flat panel. If the car is often parked in tight spaces, these are the panels worth protecting first rather than waiting for the first scrape.
Where to apply PPF first
Put PPF on the zones most likely to make contact with other cars or fixed objects first. That usually means the leading edges of doors, the corners of front and rear bumpers, and mirror caps. These are high-contact areas in parking lots, especially when people open doors too far or reverse close to posts.
Save ceramic coating for the rest of the body if you want easier washing and some resistance to light marring. Use both only if the budget allows, and remember that the film does the physical work while the coating helps the finish stay easier to clean.
Frequently asked questions
How do I protect car paint from minor parking lot scrapes?
Protect the highest-risk panels first with paint protection film on bumper corners, door edges, and mirror caps. Add a ceramic coating if you want easier cleaning and some resistance to light marring. Then park in wider spaces or end bays so other doors, posts, and carts have less chance to reach the paint.
What should I do right after someone scrapes my car in a parking lot?
Wash the area with car shampoo, rinse away loose grit, and dry it with a clean microfibre cloth before touching the mark again. Then check whether the damage is only transfer, clear coat, or paint-through. If primer shows or the mark catches a nail, stop DIY and arrange professional repair.
Can a minor parking lot scrape be fixed at home?
Yes, if it is shallow. Home repair is most reasonable for transfer marks and light clear-coat scratches that do not catch a fingernail. Use scratch remover only after washing. If the scrape reaches base coat or primer, or if it sits on a sharp edge, touch-up paint or a professional is the safer route.
How do I know if a scrape is only clear coat damage?
If the mark is hard to feel with a fingernail, stays above the colour layer, and looks lighter after washing, it may only involve the clear coat. The same source says light damage in the clear coat or base layer may be repairable. If colour is missing or primer is visible, it is deeper than clear-coat damage.
Should I use touch-up paint or scratch remover for a scrape?
Use scratch remover for shallow clear-coat defects after washing the panel. Use touch-up paint when the scrape has removed colour and exposed base coat or primer. Touch-up paint should match the vehicle paint code, and it works best in thin layers. Do not use an abrasive product on deeper paint loss.
Does ceramic coating prevent parking lot scrapes?
No. Ceramic coating can resist some marring and make cleaning easier, but it does not stop physical contact. A door edge, post, or bumper corner can still cut through it. For actual impact protection in tight parking spaces, paint protection film is the better choice on exposed areas.

Hi, I’m Melvin, an automobile engineer with extensive experience in automobile equipment. I currently work for a local automobile firm, where I specialize in the car parts industry. I’ve had the opportunity to collaborate with seasoned inspectors, gaining invaluable hands-on experience that goes beyond just theory.
My passion for automotive care started at a young age, which led me to create CarSpareCare. Through CarSpareCare, I share the knowledge and skills I’ve acquired over the years to help others navigate the world of car maintenance and repairs.
My goal is to provide practical tutorials, essential safety advice, and the latest industry insights so that anyone—whether a beginner or an expert—can confidently tackle their automotive projects.

