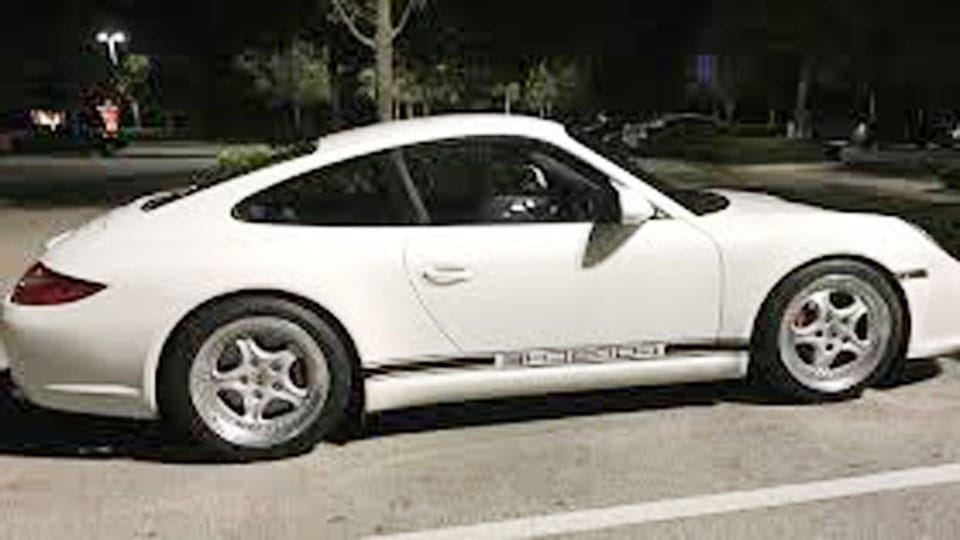
Many lifted trucks fit best around roughly 0 to -12 mm offset; wider wheels or larger tires often need about -12 to -25 mm. That said, the safe window shifts with vehicle architecture, especially independent front suspension versus a solid axle, and it can move again with brake package size, hub design, and upper control arm shape. Get it wrong and you can hit the suspension, scrub the fenders, or buy wheels that only fit after expensive spacers or extra trimming. This guide explains wheel offset, how to measure it, and how wheel width and tire size change the fitment window. Wheel offset and backspacing definitions are consistent across common wheel-industry references such as Tire Rack, Discount Tire, and BBS technical fitment guidance.
What wheel offset means

Wheel offset is the distance between the wheel’s mounting surface and its centerline, measured in millimeters. The mounting surface is the hub-facing pad where the wheel bolts on. The centerline is the halfway point across the wheel’s bead-seat width, which is the width used for fitment math, not the outer lip-to-lip width. Offset, backspacing, and wheel width are commonly defined this way in wheel and tire fitment references, including Tire Rack and manufacturer fitment charts.
Positive offset places the mounting surface toward the outside face of the wheel, so the wheel sits farther inboard. Zero offset puts the mounting surface at the centerline. Negative offset moves the wheel outward and increases track width. That change in wheel location also changes steering geometry, including scrub radius, which is why alignment and steering feel can shift after a wheel change (SAE suspension geometry references; Tire Rack fitment guidance).
Why offset changes stance and clearance
Offset changes track width, steering feel, and wheel fitment. A more positive offset usually pulls the tire closer to suspension parts. A more negative offset usually pushes the tire toward the fender edge. Either direction can create problems if the wheel width and tire size do not match the vehicle and lift kit.
On a lifted vehicle, the suspension may sit at a different operating angle than stock. That changes the clearance envelope around control arms, tie rods, ball joints, brake parts, and the fender liner. The same offset that fit before the lift may no longer clear safely, especially on independent front suspension setups where upper control arm and tie-rod swing paths are tighter than on many solid-axle trucks. Brake caliper size, hub protrusion, and upper arm shape can narrow the safe window materially.
How do you measure wheel offset?
To measure wheel offset, start with the correct wheel width, locate the centerline, then compare that point to the mounting surface. The cleanest at-home method is to measure bead-seat width, divide it in half for centerline, and then measure the mounting pad location against that midpoint. You can also read the stamped offset or compare the new wheel specs with the old wheel specs. Wheel makers and tire retailers commonly use the same bead-seat-width method for offset and backspacing calculations.
Find wheel width the right way
Use bead-seat width, not the overall outside width of the wheel. A wheel marked 8.0 inches wide is measured at the bead seats, so the outer lip-to-lip width is wider than 8.0 inches. That difference matters because offset calculations use the bead-seat width, not the full outside-to-outside dimension. This is the same convention used in industry fitment calculators and wheel tech references.
Measure the centerline from bead-seat width
Split the bead-seat width in half to find the centerline. For an 8.0-inch wheel, the centerline is 4.0 inches from either bead seat. The offset is then the distance from that centerline to the mounting surface, converted to millimeters.
Read the offset stamp or compare wheel specs
Many wheels stamp the offset on the back side, often as ET followed by a number in millimeters. If the stamp is hard to read, compare the current wheel width and offset with the new wheel using a wheel offset calculator. That is often faster than trying to infer fitment from appearance alone.
- Confirm the current wheel width in bead-seat inches.
- Confirm the current offset in millimeters.
- Compare the new wheel width to the old width.
- Compare the new offset to the old offset.
- Check tire section width and overall diameter next.
- Verify inner clearance, outer clearance, and steering movement before buying.
Offset vs backspacing
Offset and backspacing are related, but they are not the same number. Offset is measured from the wheel centerline to the mounting surface in millimeters. Backspacing is the distance from the mounting surface to the inner edge of the wheel, and it is typically measured in inches. Both describe where the wheel sits, but they use different measurement units. Tire Rack and other wheel-reference guides treat offset as the primary comparison number for modern fitment, while backspacing is often used as a shorthand for inner-clearance checks on older trucks and traditional axle layouts.
Why the two numbers are related
A wheel with less backspacing often sits farther outboard, which often means less positive or more negative offset. Because wheel width changes both numbers, you cannot compare one wheel to another by offset alone.
When backspacing is easier to use
Backspacing can help when checking inner clearance on older trucks, especially if the vehicle uses traditional axle and brake package layouts. It gives a quick picture of how far the inner wheel edge sits from suspension parts. Even then, offset remains the cleaner number for comparing modern wheel options.
Where people mix them up
Many fitment mistakes start when someone treats backspacing like offset. That leads to the wrong guess about inner clearance or outer poke. If you are comparing aftermarket wheels, keep both numbers in view, but make the final call with wheel width, offset, and tire size together.
Lifted wheel offset table
The right offset window depends on lift height, wheel width, tire size, and the vehicle’s front suspension architecture. This table gives a practical starting point, not a universal rule. A lift kit can range from 1–2 inches to 6 inches or more, and the larger the lift, the more the safe fitment window shifts toward wheel width, tire section width, and steering travel. Independent front suspension trucks usually tolerate less extreme wheel offsets than comparable solid-axle trucks because the upper control arm, tie rod, and brake package can occupy more of the wheel well at full lock and compression. OEM wheel-fitment guidance from vehicle manufacturers typically assumes stock brake/hub geometry, so any significant deviation should be checked against actual clearances rather than appearance alone.
| Lift height | Architecture / front suspension | Wheel width band | Tire diameter / section-width band | Practical offset direction | Likely rub points | Inner clearance check | Outer poke check | Alignment risk check |
|---|---|---|---|---|---|---|---|---|
| Stock | IFS or solid axle; stay close to OEM geometry | 8 to 8.5 inches | OEM diameter and near-OEM section width | Near factory offset; avoid large changes | Control arms, brake parts, fender liner | Yes | Yes | Yes if geometry changes |
| 1–2 inch leveling lift | IFS is the tighter case; solid axle usually has more room | 8 to 9 inches | Up to moderate all-terrain width; near-stock to mildly wider diameter | 0 to -12 mm is often the practical window | Upper control arm, tie rod, liner at full lock | Yes | Yes | Yes |
| 2.5–3.5 inch lift | IFS often needs more caution; solid axle may accept a wider range | 8.5 to 10 inches | Moderately taller and wider tire packages | -6 to -18 mm is often the practical window | UCA, sway bar area, outer fender edge | Yes | Yes | Yes |
| 4+ inch lift | IFS needs the most checking; solid axle often allows more negative offset before inner contact | 9 to 10 inches | Large-diameter or wide section-width tires | -12 to -25 mm is often the practical window | Fender, liner, mud flap area, steering lock points | Yes | Yes | Yes |
For stock height, factory-safe offset is usually the safest starting point. At about 1–2 inches of lift, many setups can stay near 0 to -12 mm if the tire is not oversized. At about 2.5–3.5 inches, a slightly more negative offset often helps clear suspension parts while keeping the wheel from sitting too far inward. At about 4 inches and up, wider tires and a more aggressive stance often push the fitment window toward roughly -12 to -25 mm. On an independent front suspension truck, the useful range is often narrower than on a solid-axle truck because the upper control arm and tie-rod path can shrink the safe window even when the lift height is the same. Manufacturer wheel-fitment guidance and brake-package clearance notes are especially important here because hub depth and caliper shape can change the actual no-rub offset.
How does wheel width change fitment?
Wheel width changes fitment because the bead-seat width sets the wheel’s inner and outer edges before offset is even applied. A wider wheel at the same offset moves both edges outward from the centerline. That can improve inner clearance on some setups, but it can also push the outer lip closer to the fender and tire contact points. Wheel-width and offset charts from tire retailers and wheel manufacturers use the same basic geometry: width changes the edge positions, while offset shifts the whole wheel inboard or outboard.
Narrow wheels and wider wheels
A narrower wheel usually gives more room inside the wheel well, which can help with suspension clearance. A wider wheel stretches the usable tire shape and moves the outside shoulder closer to the body. If two wheels share the same offset, the wider one can still rub sooner because its edges sit farther from the centerline.
How tire size shifts the safe window
Tire size matters because section width and overall diameter change where the rubber sits. A taller or wider tire can contact the liner, fender, or sway bar area sooner than the wheel alone would suggest. Incorrect offset after a lift can cause tire rubbing, and the tire is often the first part to show it.
Suppose you move from an 8.0-inch wheel to a 9.0-inch wheel and keep the same offset. The wheel’s outer and inner edges both move outward relative to the centerline, so a tire of the same size can now sit closer to the fender lip and farther from the upper control arm. That may solve one rub point while creating another.
Why a wider wheel can rub sooner
A wider wheel can reduce sidewall bulge, which may sound helpful, but it also changes the contact envelope. On a lifted vehicle with limited liner trim or tight steering geometry, the added width can expose fender clearance issues that were not present with the stock wheel width. This is why width and offset must be read together.
You change wheel offset by choosing a different wheel spec, not by adjusting the existing wheel. Wheel spacers can move the wheel outward, but they do not change the wheel’s offset number itself. If the goal is a cleaner fit, the best path is usually a wheel with the correct width and offset for the lift and tire size. Wheel and tire manufacturers generally recommend matching wheel width, brake clearance, and hub engagement before using spacers.
If you are considering spacers, treat them as a fitment tool, not a fix for a poor wheel choice. They can increase track width and alter steering feel. They can also create more outer poke, which may raise inspection or clearance concerns if the tire sits beyond the fender line.
Will your wheels rub after lifting?
Rubbing risk depends on whether the problem appears inside or outside the wheel well. Inner rub usually means the wheel or tire is hitting a control arm, tie rod, ball joint, or brake part. Outer rub usually means the tire is touching the fender, liner, mud flap, or arch trim. Alignment and steering angle can turn a borderline fit into a guaranteed contact point. Scrub radius changes from a large offset move can also make the truck feel twitchier or heavier at the steering wheel, which is why wheel selection should be checked against the suspension geometry, not just the stance.
Inner rub on control arms and tie rods
If the new wheel sits too far inboard, the inner barrel or tire sidewall can touch suspension components. That is common when offset is too positive for the chosen wheel width and tire size. Watch for shiny witness marks on the control arm, steering hardware, or brake dust shield after slow-speed turning.
Outer rub at the fender and liner
If the wheel sits too far outboard, the tire can contact the fender edge or liner during compression and steering. This is the usual failure point for aggressive negative offsets. Local inspection or legal rules may also limit how far the tire can extend past the fender line, and those rules vary by location.
Alignment and steering angle checks
Any lift kit changes suspension geometry, so an alignment check matters after the install. A wheel that clears in a straight line can still rub at full lock or during bump travel. Premature tire wear and handling problems can also appear if the offset change shifts scrub radius too far from factory geometry. Industry alignment references commonly note that altered scrub radius can affect steering feel, kickback, and tire wear, which is why a test-fit is only complete once you verify lock-to-lock and compression clearance.
A common first-timer mistake is buying a wheel for its stance, then discovering the steering wheel shakes or the front tires feather early. That often points to a fitment choice that pushed the geometry too far, not just a bad alignment. Start with the clearance check first, then set the alignment.
How to check fitment step by step
Use a simple geometry check before you buy. Start with the wheel width change, then calculate how much the inner and outer edges move when offset changes. Add that to the tire’s section width and overall diameter, then verify steering lock and compression. This step-by-step check is the fastest way to predict whether a lifted truck will rub.
Formula 1: width change in inches ÷ 2 = edge movement from width alone, in inches.
Formula 2: offset change in mm ÷ 25.4 = edge movement from offset change, in inches.
Inner edge change = half width increase minus offset gain toward positive, or plus offset loss toward negative.
Outer edge change = half width increase plus offset gain toward positive, or minus offset loss toward negative.
Example: moving from an 8.0-inch wheel to a 9.0-inch wheel adds 1.0 inch of width, so each edge moves 0.5 inch outward from width alone. If the new wheel is also 12 mm more negative than the old wheel, that is about 0.47 inch of additional outward shift from offset. The combined effect is roughly 0.97 inch farther out on the outer edge and 0.03 inch farther in on the inner edge, before you account for tire bulge. That is why a wheel can look “close” on paper but still rub at full lock once the tire is mounted.
After that, check the real-world clearance path: lock-to-lock steering, suspension compression, and any brake or UCA interference. A wheel that clears in the driveway can still contact the liner or control arm during articulation, so the final check should include both steering and bump travel.
FAQ
How do you work out wheel offset?
Work out wheel offset by finding the wheel’s bead-seat width, dividing that width in half for the centerline, then measuring the distance from the centerline to the mounting surface. The result is offset in millimeters. A wheel offset calculator can help compare your current wheel and a new wheel quickly.
What is wheel offset on a truck?
On a truck, wheel offset is the distance between the mounting surface and the wheel centerline. It matters because truck fitment often has more suspension travel, larger tires, and tighter fender-clearance demands after a lift. The wrong offset can cause rub on control arms, tie rods, or the fender edge.
How do you figure wheel offset after a lift?
Figure wheel offset after a lift by starting with the lift height, then checking wheel width and tire size together. A 1–2 inch leveling lift often stays near 0 to -12 mm, while a 2.5–3.5 inch lift often moves toward -6 to -18 mm. Always confirm clearance at full lock and compression, and narrow the range further if the truck has IFS, a large brake package, or a bulky upper control arm.
Will my wheels rub after lifting my car?
Your wheels may rub after lifting your car if the offset is too positive for the wheel width or too negative for the fender clearance. Inner rub usually shows up on control arms or tie rods. Outer rub usually shows up on the fender liner, arch, or mud flap area.
How do you measure auto wheel offset?
Measure auto wheel offset the same way on cars and trucks: find the bead-seat width, locate the centerline, and measure from that centerline to the mounting surface. If the wheel has an offset stamp, confirm it against the measured width. That is the quickest way to compare factory and aftermarket wheels.
What is a wheel offset?
A wheel offset is the mounting-surface position relative to the wheel centerline. Positive offset pulls the wheel inward, zero offset centers it, and negative offset pushes it outward. It affects clearance, track width, handling, and fitment, so you should always check it with wheel width and tire size. Manufacturer fitment charts and wheel-industry references use the same definition, which makes it the most reliable number for comparison shopping.

Hi, I’m Melvin, an automobile engineer with extensive experience in automobile equipment. I currently work for a local automobile firm, where I specialize in the car parts industry. I’ve had the opportunity to collaborate with seasoned inspectors, gaining invaluable hands-on experience that goes beyond just theory.
My passion for automotive care started at a young age, which led me to create CarSpareCare. Through CarSpareCare, I share the knowledge and skills I’ve acquired over the years to help others navigate the world of car maintenance and repairs.
My goal is to provide practical tutorials, essential safety advice, and the latest industry insights so that anyone—whether a beginner or an expert—can confidently tackle their automotive projects.